
Data security remains a top priority for IT organizations today. Consequently, administrators rely on automated tools to protect sensitive business information. Specifically, Microsoft Purview DLP actively scans document libraries in SharePoint Online. It continuously monitors files for credit card numbers, tax identifiers, and intellectual property.
However, security policies sometimes trigger unexpectedly. As a result, valid business documents vanish instantly from shared document libraries. Microsoft Purview moves those items into an isolated location for analysis. Therefore, learning how to recover files from Purview DLP quarantine becomes an essential skill for system administrators.
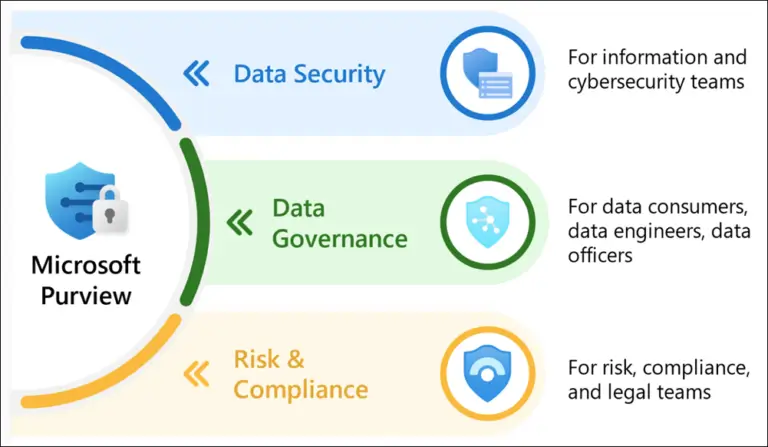
This comprehensive guide covers everything you need to know. Specifically, you will learn why files end up in quarantine. Moreover, you will discover how to locate hidden items in the Microsoft 365 compliance portal. Finally, you will master the exact steps required to perform a safe SharePoint file recovery.
Understanding How Microsoft Purview DLP Quarantines Files
First, administrators must understand how data protection mechanisms operate behind the scenes. When a user uploads or edits a document, background engines scan the content immediately. If the system detects sensitive data types, it evaluates the active policy rules.
When a rule specifies a quarantine action, the system executes three immediate steps. First, it revokes standard user access rights to the original document. Next, it moves the actual document binary to a restricted quarantine location. Finally, it leaves a text stub file in the original SharePoint library.
This stub file informs end users about the DLP policy violation SharePoint detected. However, business operations often stall when legitimate files face accidental isolation. Consequently, administrators must intervene quickly to verify false positives and restore access.
[User Uploads File] ➔ [Purview Scans Content] ➔ [DLP Violation Detected]
                                                         │
                                                         ▼
[Replace with Stub File] ◄── [Isolate Original File] ◄── [Block User Access]
Prerequisites for Restoring Quarantined Files
Before attempting document recovery, ensure your administrative account holds the proper role assignments. Standard SharePoint site collection administrators cannot view centralized compliance logs. Instead, your tenant administrator must grant specific permissions within Microsoft Purview.
Specifically, you need at least one of the following roles:
- Global Administrator: Grants full tenant-level access across all Microsoft 365 services.
- Compliance Administrator: Allows management of DLP policies, alerts, and audit logs.
- Information Protection Admin: Grants granular control over classification labels and data protection rules.
Additionally, verify that audit logging is active across your organization. Without active audit logs, tracking isolated files becomes significantly harder. You can review tenant settings on the official Microsoft Learn Compliance Overview.
⚠️ Warning: Never assign permanent Global Admin privileges solely for routine DLP file management. Instead, use Role-Based Access Control (RBAC) to enforce the principle of least privilege.
Step 1: Locate the Quarantined File in Microsoft Purview
To begin the recovery process, access the central management dashboard. Open your web browser and navigate directly to the Microsoft Purview Compliance Portal.
Next, follow these exact steps to pinpoint the incident:
- Expand the left navigation menu and select Data loss prevention.
- Click on the Alerts tab to view recent security triggers.
- Apply filters to narrow down the events by service type (SharePoint).
- Locate the specific alert matching your missing document name or site URL.
- Click the alert title to open the detailed incident summary blade.
The summary panel displays critical operational details. Specifically, you can view the document author, exact site collection path, and matched sensitive data types. Furthermore, the portal shows the specific policy rule that initiated the quarantine action.
💡 Pro-Tip: If the main alerts queue appears empty, navigate to the Audit section on the left menu. Search for the activity named File modified or blocked by DLP policy over the last 24 hours.
Step 2: Access the Quarantine Storage Location
Microsoft Purview handles quarantine storage through two primary mechanisms. In most deployments, Purview creates a dedicated, hidden quarantine library inside the target site collection. Alternatively, high-security organizations route quarantined files to a centralized compliance site collection.
To inspect the isolated file directly, perform the following steps:
- Open the SharePoint Admin Center via Microsoft SharePoint Management.
- Locate the site collection where the file originally resided.
- Append
/DLPQuarantineor/PreservationHoldLibraryto the root site URL. - Log in using your privileged Compliance Admin credentials.
Inside this protected library, you will find the original file structure intact. However, inherited permissions remain disabled to prevent unauthorized user access. For detailed guidance on library permissions, consult the SharePoint Admin Documentation.
Step 3: Evaluate and Release False Positives
Never restore files blindly without conducting a thorough security assessment. First, review the content to confirm whether it contains genuine sensitive data. For instance, inspect the document for unencrypted social security numbers or private financial logs.
If your review confirms a false positive, you must clear the quarantine lock. Follow these procedural steps within the Purview dashboard:
- Reopen the specific alert inside the Data loss prevention Alerts portal.
- Select the option labeled Manage alert details.
- Change the alert status from Active to Dismissed.
- Select False Positive as the official resolution reason.
- Enter a brief justification note in the comment box for auditing purposes.
Dismissing the alert records an official audit entry. Consequently, compliance officers can track why security staff overrode the automated protection rule.
Step 4: Restore Quarantined SharePoint Files
Once you clear the security alert, proceed with the actual file restoration. The exact method depends on how your tenant policy handled the initial isolation.
Method A: Direct Portal Release
In modern Microsoft Purview builds, admins can release items directly from the incident investigation tab:
- Open the incident details panel inside the Purview portal.
- Click on the Actions button at the top of the screen.
- Select Release file from quarantine.
- Confirm the prompt to push the document back to its original path.
Method B: Manual Document Relocation
If direct release is unavailable, move the file manually using SharePoint administration tools:
- Navigate directly to the hidden quarantine library URL.
- Select the target file checkbox.
- Click Move to on the top command bar.
- Target the original SharePoint document library path.
- Overwrite or remove the text stub file remaining in that folder.
[Select Quarantined File] ➔ [Click 'Move To'] ➔ [Select Target Library] ➔ [Overwrite Stub]
For advanced scripting across hundreds of files, administrators can utilize PowerShell. Check out the official PnP PowerShell Repository for automated bulk restoration scripts.
Step 5: Adjust DLP Policies to Prevent Recurring Incidents
Restoring a document solves the immediate user issue. However, the automated scanner will simply quarantine the file again during the next crawl cycle. Therefore, updating the underlying rule configuration remains a critical final task.
Consider applying these adjustments inside your policy builder:
- Increase Match Thresholds: Require multiple instance matches (e.g., 5+ credit card numbers) before enforcing quarantine.
- Add Exclusions: Exclude specific trusted document libraries or user groups from strict blocking rules.
- Enable User Overrides: Allow document owners to provide a valid business justification to bypass the block.
Furthermore, test policy changes inside Test Mode first. Test mode evaluates policy conditions without disrupting end-user workflows or isolating active documents.
Warning: Disabling policy rules entirely creates major compliance vulnerabilities. Always prefer granular exceptions over global policy shutdowns.
Best Practices for Incident Management
Maintaining balance between productivity and security requires ongoing operational tuning. Consequently, enterprise IT teams should establish clear operational protocols for handling SharePoint DLP quarantine events.
First, configure real-time notification alerts for service desk personnel. When Purview isolates a document, the helpdesk receives instant email notifications. As a result, technicians can investigate incidents before users submit support tickets.
Second, document all override actions meticulously. Compliance auditors regularly examine security overrides. Therefore, retaining detailed records protects your department during external security reviews. You can learn more about auditing standards at Microsoft Security Best Practices.
| Management Task | Recommended Frequency | Responsible Team |
| Review Active DLP Alerts | Daily | Security Operations (SOC) |
| Tune Overly Strict Rules | Bi-weekly | Compliance Administrators |
| Audit Admin Overrides | Monthly | Internal Audit / CISO |
| Update Sensitive Info Types | Quarterly | Data Governance Team |
Final Thoughts and Community Discussion
Automated data loss prevention keeps organization data secure. However, strict automation occasionally disrupts legitimate daily operations. By following this guide, you can quickly restore quarantined SharePoint files while maintaining strong enterprise governance.
Always remember to combine rapid file recovery with proactive policy tuning. Consequently, your users stay productive while your organization remains fully compliant.
Now, we want to hear from you! How does your organization handle false positive DLP quarantines? Have you implemented user overrides, or do admins review every incident manually? Share your thoughts, questions, and experiences in the comments section below!
If you found this article helpful, please share it with your fellow sysadmins on LinkedIn and Twitter!