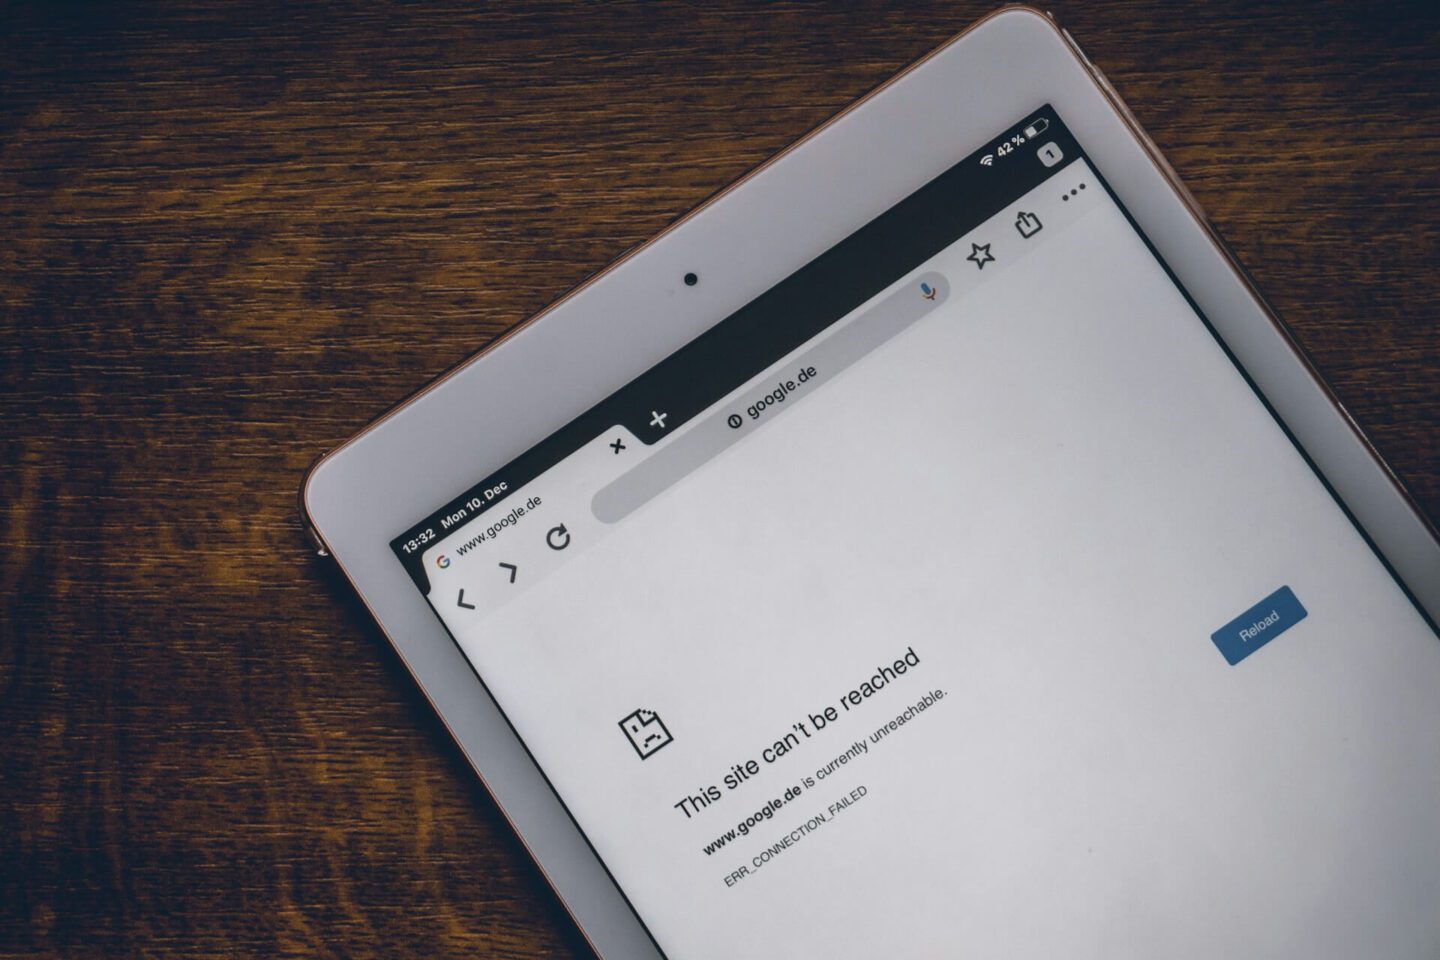
Your Windows 11 laptop shows a strong Wi-Fi signal, but websites refuse to load. You refresh the browser, restart the application, and still get nowhere. Meanwhile, the Wi-Fi icon looks perfectly normal. Sound familiar?
The Wi-Fi connected but no internet problem can leave even experienced computer users scratching their heads. Sometimes, Windows displays “No internet, secured” beneath your wireless connection. Other times, everything appears connected, but browsers and online applications remain offline.
Here’s the important distinction: a Wi-Fi connection doesn’t automatically mean you have internet access. Wi-Fi establishes communication between your computer and a wireless router. However, that router must also maintain a working connection to your internet service provider.
Several problems can interrupt this communication. Common causes include:
- Router or modem failures: Temporary firmware issues or interrupted internet service.
- Incorrect IP configuration: DHCP problems or missing default gateway information.
- DNS resolution errors: Windows cannot translate website names into usable IP addresses.
- Wireless driver problems: Outdated or incompatible software affects your Wi-Fi adapter.
- VPN or proxy interference: Incorrect routing settings prevent applications from reaching the internet.
- ISP outages: Your provider experiences service interruptions despite your Wi-Fi remaining connected.
Before changing anything, connect your smartphone to the same Wi-Fi network. Temporarily disable mobile data, then try opening a website.
If your phone also cannot connect, investigate the router or internet provider first. However, if your phone works normally, the problem probably involves your Windows 11 computer.
This quick comparison can save considerable troubleshooting time.
Below, I’ll walk you through 10 practical ways to fix Wi-Fi on Windows 11. We’ll start with basic connection checks before moving into DNS, IP configuration, drivers, and network resets.
Follow the fixes in order, and test your connection after each one.
1. Restart Your Wi-Fi Router, Modem, and Windows 11 PC
When troubleshooting network problems, I usually start with the simplest solution: restarting the affected equipment. It sounds basic, but there’s a technical reason behind it.
Routers and modems run firmware and maintain numerous connection states. Occasionally, their networking services stop responding correctly. Your router might continue broadcasting Wi-Fi while losing its connection to your internet provider.
Consequently, Windows connects to the wireless network but cannot access external websites.
How to Restart Your Router and Modem Properly
If your home uses separate modem and router devices, follow these steps:
- Save your work and shut down your Windows 11 PC.
- Disconnect your router’s power cable.
- Disconnect your modem’s power cable.
- Wait approximately 30 seconds.
- Reconnect the modem and wait for its connection indicators to stabilize.
- Reconnect your wireless router.
- Wait until the router finishes starting.
- Turn on your computer and reconnect to Wi-Fi.
If you use a combined modem-router gateway, restart that single device instead. Allow several minutes for the equipment to establish its internet connection.
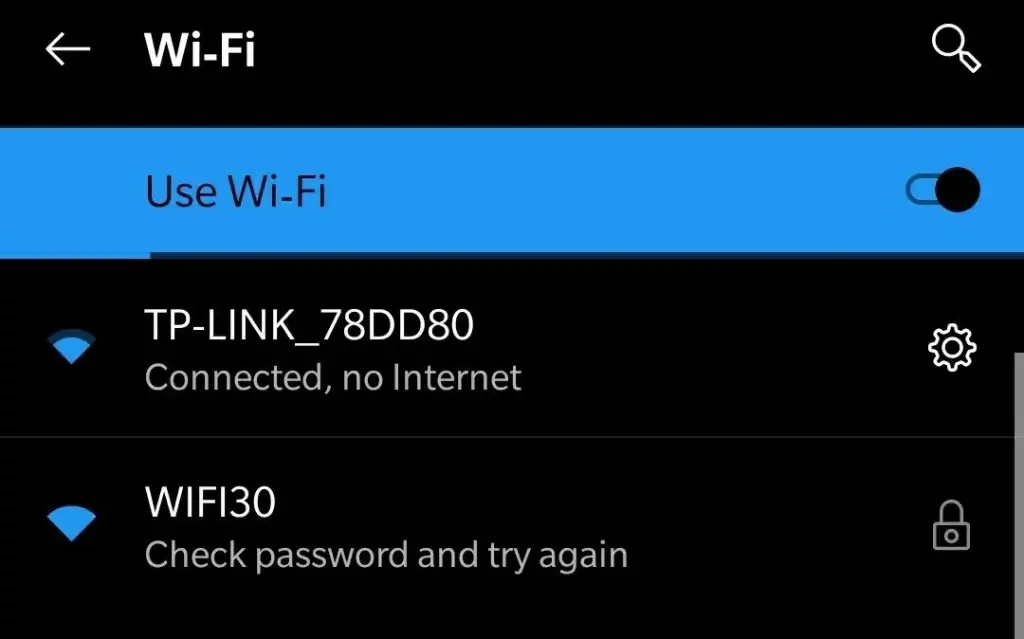
After restarting, open your browser and test several websites. Also, check whether another device can access the internet through the same router.
Why Restarting Can Restore Internet Access
Restarting clears temporary runtime states and initializes the networking services again. Depending on the equipment, it may also establish a fresh connection with your ISP.
However, a restart cannot fix every problem. Defective cables, incorrect configurations, and internet service outages may still prevent connectivity.
⚠️ Warning: Restarting a router differs from performing a factory reset. A factory reset can erase customized wireless passwords, ISP settings, and other important configurations.
If the internet indicator remains red or shows no connection, check your provider’s service status. Otherwise, continue with the next fix.
2. Forget and Reconnect to Your Wi-Fi Network
Windows 11 stores information about wireless networks you’ve previously joined. This information includes authentication details, network names, and connection preferences.
Normally, saved profiles allow your computer to reconnect automatically. However, outdated or damaged profile settings can sometimes cause connection problems.
This may happen after replacing a router, changing wireless security settings, or modifying network configurations. Forgetting the network removes its saved wireless profile. When you reconnect, Windows creates a new profile using the current network settings.
How to Forget a Wi-Fi Network in Windows 11
Follow these instructions:
- Press Windows + I to open Settings.
- Select Network & internet.
- Click Wi-Fi.
- Open Manage known networks.
- Locate your current wireless network.
- Click Forget.
- Return to the available Wi-Fi networks.
- Select your network and click Connect.
- Enter the correct Wi-Fi password.
- Click Next and wait for Windows to connect.
You can also access nearby wireless networks through Quick Settings. Press Windows + A, then open the Wi-Fi connection list. Microsoft explains this process in its guide to connecting to Wi-Fi networks in Windows.
What Happens When You Forget a Wi-Fi Network?
Windows removes the stored wireless credentials and connection profile. However, it doesn’t uninstall your adapter or delete personal files. You’ll need to enter the Wi-Fi password again. Therefore, confirm that you know the correct password before removing the saved profile.
Also, forgetting the network doesn’t reset the router itself. If your router lacks internet connectivity, creating a new Windows profile won’t restore service. This method works best when Windows 11 Wi-Fi is not working on one particular wireless network.
3. Run Windows 11’s Built-In Network Troubleshooter
Windows 11 includes automated diagnostics that can identify common networking problems. These tools examine connection states, adapter behavior, and certain configuration settings.
Although automated troubleshooting doesn’t solve every problem, it provides a useful starting point. More importantly, it may identify errors that aren’t immediately obvious.
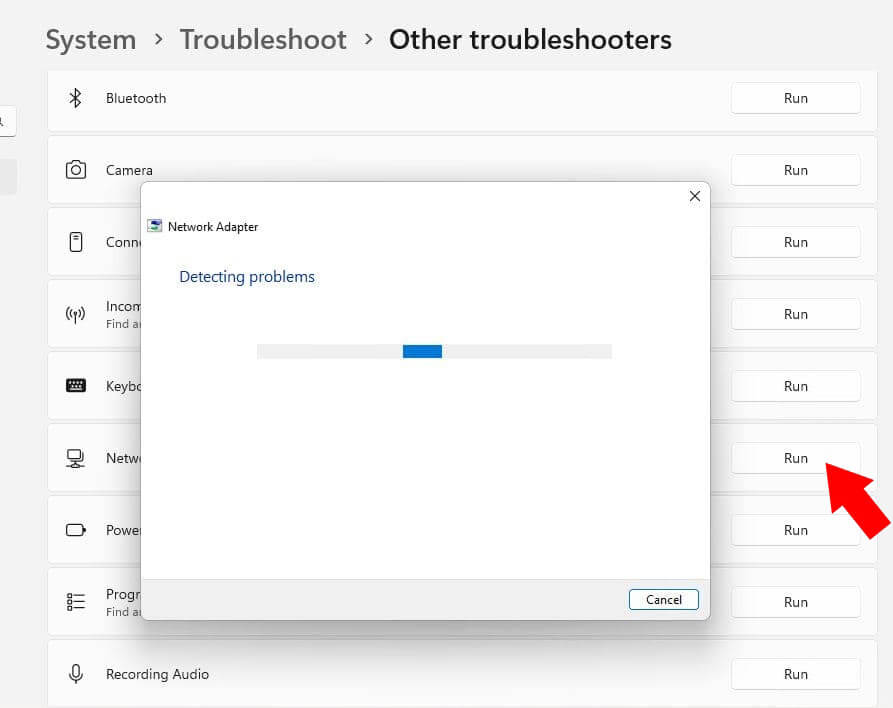
Recent Windows 11 versions use Microsoft’s Get Help application for network troubleshooting. The application guides users through diagnostic checks and recommended actions.
How to Run the Windows 11 Network Troubleshooter
Follow these steps:
- Press Windows + I to open Settings.
- Select System.
- Click Troubleshoot.
- Open Other troubleshooters.
- Find Network and Internet.
- Click Run.
- Complete the Get Help diagnostic steps.
- Apply any appropriate recommended fixes.
- Test your internet connection again.
Alternatively, open Start and search for Get Help. Enter “connect to network and internet” in the search field. Select Run network diagnostics when the option appears.
Microsoft provides the current procedure in its Windows network troubleshooter documentation.
Understanding the Troubleshooter Results
The diagnostic results may reveal problems involving your wireless adapter, default gateway, or network configuration.
For example, incorrect gateway information can prevent your computer from reaching external networks. Similarly, DNS errors may stop websites from loading despite a working wireless connection. If Windows recommends a configuration change, review it before proceeding. This matters especially on business computers with customized network settings.
Sometimes, the troubleshooter cannot identify the underlying problem. That doesn’t necessarily mean your network works correctly. It simply means the automated tests couldn’t isolate the failure.
💡 Tip: Record diagnostic errors before closing the troubleshooter. These messages can help identify DHCP, DNS, adapter, or routing problems later.
If automated diagnostics cannot restore connectivity, continue with the next method.
4. Disable and Re-Enable Your Wi-Fi Network Adapter
Your Wi-Fi adapter manages wireless communication between Windows and your router. It may be integrated into your motherboard or installed as a separate device.
Occasionally, the adapter enters an abnormal operating state. This might happen after sleep mode, driver interruptions, or unexpected connection failures.
Windows may still display available wireless networks, yet internet communication remains unreliable. Disabling and re-enabling the adapter forces Windows to restart that network interface. Unlike driver removal, this process doesn’t uninstall the adapter’s software.
How to Restart Your Wi-Fi Adapter
Follow these steps:
- Press Windows + I.
- Open Network & internet.
- Select Advanced network settings.
- Locate your Wi-Fi adapter.
- Click Disable.
- Wait approximately 10 seconds.
- Click Enable.
- Reconnect to your wireless network if necessary.
- Test your internet connection.
Alternatively, press Windows + R, type ncpa.cpl, and press Enter. The traditional Network Connections window will appear. Right-click your Wi-Fi adapter, select Disable, and enable it again.
Why Restarting the Adapter Helps
Reinitializing the adapter can clear temporary communication problems between Windows and the wireless hardware. It also forces the adapter to establish a fresh wireless connection.
Depending on your network configuration, Windows may request updated DHCP information. However, the adapter restart doesn’t guarantee a different IP address.
This method is particularly useful when Wi-Fi stops responding after sleep or hibernation. If the problem keeps returning, investigate the installed driver and power-management behavior.
⚠️ Warning: Avoid disabling network adapters during remote support sessions. Doing so can disconnect the remote technician and interrupt active applications.
If the problem persists, examine your DNS configuration next.
5. Flush the DNS Cache and Change DNS Servers
Sometimes, your computer has internet connectivity but cannot open websites. One possible cause involves the Domain Name System (DNS).
DNS translates website names into IP addresses that computers use for communication. For example, your browser needs an IP address to contact google.com.
Windows also maintains a local DNS resolver cache. This cache stores results from previous lookups to reduce repeated DNS requests. However, outdated or incorrect cached information can occasionally create connection problems.
Step 1: Flush the Windows 11 DNS Cache
Flushing the DNS cache removes dynamically stored DNS records from Windows. The system then requests fresh information when applications perform new DNS lookups.
Follow these instructions:
- Open Start and search for
cmd. - Right-click Command Prompt.
- Select Run as administrator.
- Approve the permission prompt.
- Enter the following command:
ipconfig /flushdns- Press Enter.
Windows should display a successful completion message.
Close Command Prompt and test several websites. If incorrect cached records caused the problem, flushing the cache may restore normal browsing. Microsoft documents this operation in its IPConfig command reference.
However, clearing the cache won’t repair an unavailable DNS resolver. If DNS queries continue failing, try another trusted DNS provider.
Step 2: Change Your DNS Servers
Most home networks receive DNS settings automatically through the router. However, the configured resolver may occasionally experience service problems.
Testing another provider can help identify whether DNS contributes to your connectivity issue.
| DNS provider | Preferred DNS | Alternate DNS |
|---|---|---|
| Cloudflare | 1.1.1.1 | 1.0.0.1 |
| Google Public DNS | 8.8.8.8 | 8.8.4.4 |
To configure custom DNS servers:
- Open Settings → Network & internet → Wi-Fi.
- Select your connected Wi-Fi network’s properties.
- Locate DNS server assignment.
- Click Edit.
- Change Automatic (DHCP) to Manual.
- Enable IPv4.
- Enter your preferred and alternate DNS addresses.
- Click Save.
If Windows offers DNS-over-HTTPS settings, choose options supported by your selected provider. Cloudflare provides additional guidance in its Windows 11 DNS configuration documentation.
Step 3: Test Whether DNS Is the Problem
Open Command Prompt and enter:
ping 1.1.1.1Successful replies indicate that your computer can reach that address using ICMP. However, they don’t prove that every internet service works. Next, test DNS resolution:
nslookup google.comIf the command returns valid IP addresses, the selected DNS resolver completed that lookup. If it times out, investigate your DNS configuration. Remember that some networks block ICMP traffic. Therefore, a failed ping doesn’t automatically prove internet access is unavailable.
If custom DNS doesn’t help, restore Automatic (DHCP) under DNS server assignment.
💡 Pro-Tip: Identify a DNS Problem Before Changing Settings
Test IP connectivity and DNS resolution separately.
First, run ping 1.1.1.1. Next, run nslookup google.com.
If IP connectivity succeeds but DNS lookups fail, investigate DNS settings before resetting Windows networking.
Also, remember that corporate networks may require internal DNS servers. Don’t replace organization-managed settings without authorization.
6. Release and Renew Your Windows 11 IP Address
Every device on a network needs an IP address to communicate with other devices. Your router typically assigns this address through Dynamic Host Configuration Protocol (DHCP).
Windows normally handles DHCP automatically whenever you join a network. However, configuration problems can prevent your computer from obtaining usable addressing information.
I’ve encountered this after router replacements, network changes, and unexpected power interruptions. Fortunately, Windows includes commands that release and renew DHCP-assigned IPv4 settings.
Step 1: Check Your Current IP Configuration
Before changing anything, inspect your wireless adapter’s settings.
- Open Command Prompt.
- Enter:
ipconfig /all- Press Enter.
- Locate Wireless LAN adapter Wi-Fi.
- Check IPv4 Address, Default Gateway, and DHCP Enabled.
Many home networks use addresses beginning with 192.168.x.x or 10.x.x.x. However, other private address ranges are also valid.
Pay particular attention to an address beginning with 169.254.x.x. Windows may assign this address when automatic IPv4 configuration fails to obtain a DHCP lease.
Also, examine the default gateway. Without an appropriate gateway route, your computer may not reach external networks.
Step 2: Release and Renew Your IP Address
If your computer uses DHCP, try requesting fresh IPv4 configuration.
- Right-click Start.
- Select Terminal (Admin).
- Open a Command Prompt tab if necessary.
- Enter:
ipconfig /release- Press Enter.
- Next, enter:
ipconfig /renew- Press Enter and allow Windows to request network settings.
- Run
ipconfig /allagain to review the results.
The release command temporarily interrupts IPv4 connectivity on affected adapters. Meanwhile, the renew command requests configuration from the DHCP server.
Windows may receive the same IP address again. That’s normal and doesn’t indicate failure. You can also target a specific interface using its exact adapter name.
For example:
ipconfig /renew "Wi-Fi"If Windows cannot contact the DHCP server, investigate the router and its DHCP configuration.
⚠️ Warning: Don’t switch a computer using required static addressing to DHCP without documenting its configuration. This can disrupt printers, business applications, and local network resources.
7. Reset TCP/IP and Windows Winsock Settings
Windows relies on several networking components to communicate with internet services. Two important components are the TCP/IP stack and Windows Sockets, commonly called Winsock.
TCP/IP handles essential network communication functions, including addressing and packet delivery. Winsock provides interfaces that applications use to communicate over networks.
Sometimes, incorrect configurations or damaged provider registrations interfere with these components. VPN software, security filters, and networking applications can also introduce additional complexity. Because these resets affect broader Windows networking settings, reserve them for persistent problems.
Step 1: Reset the Winsock Catalog
Open Terminal (Admin) or an elevated Command Prompt.
Enter:
netsh winsock resetPress Enter and wait for Windows to confirm the operation. This command resets the Winsock catalog. It may resolve issues involving damaged or incompatible Winsock provider entries.
Windows will instruct you to restart your computer. Before restarting, you can perform the TCP/IP reset described below. For technical details, see Microsoft’s Netsh Winsock documentation.
Step 2: Reset TCP/IP Configuration
In the same elevated terminal, enter:
netsh int ip resetPress Enter and allow Windows to complete the operation. You can also generate a troubleshooting log:
netsh int ip reset resetlog.txtAfter completing the reset commands, restart your computer. Reconnect to Wi-Fi and test several websites.
What Happens After Resetting TCP/IP?
Windows may restore relevant TCP/IP settings to their defaults. Consequently, some computers require additional networking configuration.
This matters when using static addresses, custom routes, specialized networking applications, or VPN software. Record important settings before proceeding.
Also, remember that these commands cannot repair defective wireless hardware or an ISP outage. If connectivity remains unavailable, examine software that controls network traffic.
8. Check VPN, Proxy, and Firewall Settings
Sometimes, Windows connects successfully, but another application prevents internet traffic from reaching its destination. VPN clients, proxy servers, and firewall rules can influence how your computer communicates with external services.
For example, some VPN applications include kill switches that block internet traffic after disconnection. Likewise, incorrect proxy settings can prevent browsers and compatible applications from opening websites.
The goal isn’t to remove security protection. Instead, identify whether a specific setting causes the failure.
Step 1: Check Your VPN Connection
Start by reviewing your VPN configuration.
- Open Settings → Network & internet.
- Select VPN.
- Review your configured connections.
- Disconnect a personal VPN temporarily, if appropriate.
- Test whether normal browsing returns.
If you use a third-party VPN application, open its settings directly. Check its kill switch, automatic connection options, and server selection. Some kill switches continue blocking traffic even after the VPN disconnects.
If disabling your personal VPN restores browsing, investigate its configuration before reconnecting. However, don’t disconnect organization-managed VPN services without authorization.
Step 2: Review Your Proxy Settings
A proxy server forwards certain network requests through an intermediary system. Organizations often use proxies for access control and traffic filtering. However, an incorrect proxy address can interrupt browsing.
To inspect your settings:
- Open Settings.
- Select Network & internet.
- Click Proxy.
- Review Automatic proxy setup.
- Check Use setup script.
- Examine Manual proxy setup.
- Disable an unnecessary manual proxy configuration.
- Save your changes and test browsing.
Most ordinary home connections don’t require a manually configured proxy. However, corporate and school networks may rely on specific proxy settings. Microsoft provides further guidance in its Windows proxy server documentation.
Step 3: Check Firewall Rules
Windows Defender Firewall controls incoming and outgoing network traffic. Normally, its default configuration allows ordinary web browsing. However, customized outbound rules can block specific applications.
Follow these steps:
- Open Start.
- Search for Windows Defender Firewall with Advanced Security.
- Launch the application.
- Select Outbound Rules.
- Review rules affecting your browser or failing applications.
- Check whether relevant rules block outgoing traffic.
Avoid modifying unfamiliar rules without understanding their purpose. You can also review firewall status under Windows Security → Firewall & network protection.
⚠️ Warning: Never permanently disable Windows Defender Firewall simply to restore browsing. Doing so weakens your computer’s protection without addressing the underlying problem.
If you use another security suite, consult its documentation before changing its filtering settings. Test connectivity after each authorized adjustment. If nothing changes, restore your original configuration.
9. Update or Reinstall Your Wi-Fi Adapter Driver
Your Wi-Fi adapter depends on a device driver to communicate with Windows. This software controls how Windows interacts with the wireless hardware. When drivers become incompatible or malfunction, connectivity may become unstable.
I’ve seen these problems occur after Windows updates and unsuccessful driver installations. Older laptops sometimes experience compatibility problems with specific wireless chipsets. Before considering hardware replacement, inspect the installed driver.
Step 1: Identify Your Wireless Adapter
Follow these steps:
- Right-click Start.
- Select Device Manager.
- Expand Network adapters.
- Locate your Wi-Fi device.
- Right-click it and select Properties.
- Open the Driver tab.
- Review the driver provider, version, and date.
Common adapter manufacturers include Intel, Realtek, Qualcomm, and MediaTek. If Device Manager displays a yellow warning symbol, inspect the device status message. Record the exact adapter model before downloading replacement software.
Step 2: Update Your Wi-Fi Driver
If you have temporary internet access, check Windows Update first.
- Open Settings → Windows Update.
- Click Check for updates.
- Select Advanced options → Optional updates, if available.
- Review available driver updates.
- Install any suitable wireless driver update.
- Restart Windows when necessary.
Alternatively, right-click your Wi-Fi adapter in Device Manager. Select Update driver → Search automatically for drivers. +Windows may report that the best available driver is already installed. However, that doesn’t guarantee you have the manufacturer’s latest compatible release.
For laptops, I generally recommend checking the manufacturer’s official support website.
Useful resources include:
- Intel Download Center
- Dell Drivers & Downloads
- HP Driver Support
- Lenovo PC Support
- ASUS Download Center
Choose a driver matching your exact computer model and Windows version. Avoid unofficial driver download websites. Incorrect packages can introduce additional compatibility problems.
Step 3: Roll Back a Recently Updated Driver
If Wi-Fi problems began immediately after a driver update, consider restoring the previous version.
- Open Device Manager.
- Expand Network adapters.
- Right-click your Wi-Fi adapter.
- Select Properties.
- Open the Driver tab.
- Click Roll Back Driver, if available.
- Restart your computer.
The rollback option may appear unavailable when Windows lacks a previous driver package. In that situation, check whether the manufacturer offers an earlier compatible driver.
Step 4: Reinstall Your Wi-Fi Adapter Driver
If updating or rolling back fails, reinstalling the driver may help. However, download a compatible driver package before removing the existing installation.
Follow these steps:
- Download the correct driver using another computer if necessary.
- Save the installer to a USB flash drive.
- Open Device Manager.
- Expand Network adapters.
- Right-click your Wi-Fi adapter.
- Select Uninstall device.
- Initially leave any driver-package removal option unchecked.
- Click Uninstall.
- Restart your computer.
Windows normally detects the wireless adapter and attempts to reinstall its driver. If automatic installation fails, use your downloaded manufacturer package. Microsoft explains driver management in its Device Manager update guide.
💡 Pro Tip: If a recent driver update caused the problem, try rollback before uninstalling anything. This approach usually requires fewer changes.
If the driver appears healthy but internet access still fails, consider the final recovery method.
10. Perform a Windows 11 Network Reset as a Last Resort
A Windows 11 network reset provides a more extensive repair option than restarting your Wi-Fi adapter. Windows removes installed network adapters and their settings. After restarting, it reinstalls the adapters and restores default networking configurations.
This process can resolve certain persistent connectivity problems. However, it may also remove settings that other applications require. For that reason, I recommend network reset only after simpler troubleshooting methods fail.
Step 1: Prepare Before Resetting
Before proceeding, document any networking settings your computer requires. Important items may include:
- Wi-Fi network names and passwords.
- Static IP addresses.
- Custom DNS configurations.
- VPN connection settings.
- Proxy server information.
- Virtual network adapters and switches.
- Specialized network configurations.
Some VPN clients and virtual networking tools may require reinstallation or additional configuration afterward. If your computer belongs to an organization, contact your IT administrator before proceeding.
Step 2: Perform the Windows 11 Network Reset
Follow these steps:
- Press Windows + I.
- Select Network & internet.
- Open Advanced network settings.
- Click Network reset.
- Select Reset now.
- Click Yes to confirm.
- Save your work before Windows restarts.
- Allow Windows to finish restarting.
Afterward, reconnect to Wi-Fi if necessary. Open several websites and verify that your internet connection works. Microsoft recommends using network reset as a final troubleshooting option in its official Windows Wi-Fi troubleshooting guide.
What Happens After a Network Reset?
A network reset doesn’t erase your documents or personal files. However, it can remove customized network settings. Windows may also change known connections to the Public network profile. This can affect network discovery and local file sharing.
VPN clients, virtual switches, and specialized networking applications may require further setup. Therefore, verify both internet access and essential local network services afterward.
⚠️ Warning: Network reset cannot fix an ISP outage, defective modem, or damaged Wi-Fi adapter. Confirm those possibilities before resetting Windows.
What If Your Internet Still Doesn’t Work?
If all ten fixes fail, stop changing settings without a clear diagnosis. Instead, connect your computer to another trusted network, such as a smartphone hotspot.
If your laptop works through the hotspot, investigate the original router or internet connection. However, if every network fails, examine your computer’s hardware and configuration. You can also test Ethernet connectivity if your computer supports it.
A working wired connection alongside failing Wi-Fi suggests a wireless-specific issue. For persistent problems, Windows can generate a detailed wireless connection report. Open an elevated Command Prompt and enter:
netsh wlan show wlanreportWindows generates an HTML report containing recent wireless connection events. Microsoft explains how to interpret this information in its wireless network report guide.
If necessary, contact your computer manufacturer or a qualified technician. Provide your adapter model, Windows version, error messages, and troubleshooting results.
Final Thoughts: Restore Your Windows 11 Internet Connection and Prevent Future Problems
Seeing Wi-Fi connected but no internet doesn’t automatically mean your computer needs expensive repairs.
In many cases, a temporary network configuration problem causes the interruption. Sometimes, restarting the router or reconnecting to Wi-Fi restores internet access.
However, persistent connectivity failures require a more systematic approach. Start with your router, Wi-Fi profile, and network adapter. Next, examine DNS, DHCP, VPN settings, and wireless drivers. Reserve advanced networking resets for situations that justify broader configuration changes.
How to Prevent Future Windows 11 Wi-Fi Problems
Although no network connection is completely trouble-free, good maintenance habits can reduce recurring problems.
- Keep Windows 11 updated. Install supported system updates and relevant networking fixes.
- Use compatible Wi-Fi drivers. Download drivers from Windows Update or official manufacturer websites.
- Maintain your router. Check for manufacturer firmware updates and follow supported installation procedures.
- Document network changes. Save important IP, DNS, proxy, and VPN configurations before modifying them.
- Review VPN settings. Check kill switches and connection behavior when traffic unexpectedly stops.
- Monitor recurring failures. Record when disconnections occur and which devices experience them.
Also, remember that Wi-Fi signal strength doesn’t measure internet service quality. Your computer may display an excellent wireless signal even during an ISP outage. When problems occur, compare connectivity across multiple devices before modifying Windows.
When Should You Contact Your Internet Provider?
Contact your ISP when several devices consistently lose internet access through the same router. Also, report persistent modem synchronization failures or recurring service interruptions.
However, if only one Windows computer experiences problems, investigate that device first. A systematic approach usually produces better results than randomly changing settings.
Which Fix Worked for Your Windows 11 PC?
Did you restore your connection by flushing DNS, renewing your IP address, or reinstalling your Wi-Fi driver? Perhaps another method solved the issue.
Share your experience in the comments below. Tell us which solution worked or describe the error message you’re still receiving. Your feedback could help another Windows 11 user solve the same frustrating problem.
If this guide helped you get back online, share it with friends, coworkers, and fellow Windows users. For more hands-on troubleshooting guides, practical computer maintenance tips, and networking advice, visit Technical Forum.