
Is your Windows 11 running slow, even though your computer worked perfectly a few months ago? Perhaps applications take forever to open, File Explorer freezes, or your PC struggles with basic tasks. Worse, your computer might take several minutes to become usable after startup.
These problems frustrate users, especially when their computers should handle everyday work without difficulty. Fortunately, a slow Windows 11 computer doesn’t always require expensive upgrades. Often, a few configuration changes can restore much of its responsiveness.
Over time, installed applications, background services, and temporary files can compete for system resources. Meanwhile, insufficient memory, outdated drivers, and storage bottlenecks can make matters worse. Understanding these causes helps you speed up Windows 11 without making unnecessary changes.

However, not every performance problem comes from Windows itself. Aging hard drives, overheating components, and limited RAM can also slow your computer. Therefore, identifying the actual bottleneck matters more than changing random settings.
Check What’s Slowing Down Your PC First
Before applying any fixes, check which resources your computer uses most.
- Press Ctrl + Shift + Esc to open Task Manager.
- Select Processes from the left sidebar.
- Check the CPU, Memory, and Disk columns.
- Click each column heading to identify resource-intensive applications.
- Observe these readings while your computer runs slowly.
Consistently high memory usage might indicate insufficient RAM or excessive background activity. Meanwhile, sustained disk activity could point toward storage-intensive processes or an aging hard drive.
High CPU usage might indicate demanding applications, Windows maintenance, or unwanted software. However, occasional resource spikes are normal and don’t necessarily indicate trouble.
Avoid ending unfamiliar processes without checking their purpose. Windows relies on several essential background services for security, updates, and hardware management. For additional troubleshooting guidance, Microsoft provides an official Windows performance optimization guide.
Now, let’s examine 12 practical fixes that can improve your Windows 11 performance.
1. Disable Unnecessary Startup Programs and Background Apps
One common reason for slow Windows 11 startup is excessive startup applications. Many programs automatically configure themselves to launch whenever you sign in.
Cloud storage utilities, messaging applications, gaming launchers, and update assistants frequently add themselves to startup. Although some provide useful services, others consume resources without delivering immediate value.
Consequently, Windows must load these applications alongside essential system processes. This increases startup activity and sometimes delays desktop responsiveness.
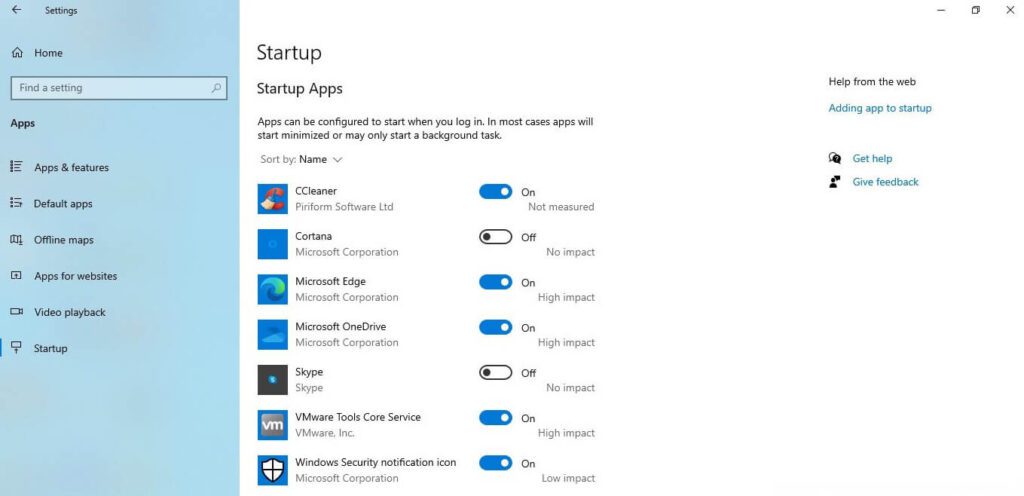
You may reach the desktop quickly but still experience sluggish applications afterward. Background programs might continue consuming resources long after Windows displays the taskbar.
Fix #1: Disable Unnecessary Startup Applications
Windows 11 provides a built-in tool for managing applications that launch during sign-in.
- Press Ctrl + Shift + Esc to open Task Manager.
- Select Startup apps from the left sidebar.
- Review the applications and their Startup impact values.
- Identify programs you don’t need immediately after signing in.
- Right-click an unnecessary application and select Disable.
- Restart your computer and evaluate the results.
Consider reviewing these common startup applications:
- Microsoft Teams and Zoom: Disable automatic startup when you don’t need immediate notifications.
- Steam and gaming launchers: Open them manually when needed.
- Spotify and media players: Avoid loading entertainment applications during startup.
- Adobe helper applications: Review optional background components before disabling them.
- Third-party update utilities: Disable unnecessary launchers while maintaining important software updates.
However, leave essential security programs and hardware management utilities alone unless you understand their functions. Disabling startup doesn’t uninstall the application. You can still launch it manually whenever necessary. Microsoft explains additional options in its startup application configuration guide.
Fix #2: Restrict Unnecessary Background Applications
Startup applications aren’t the only programs consuming resources. Some applications continue operating after you close their windows. For supported Windows applications, you can restrict background permissions directly through Settings.
- Open Settings → Apps → Installed apps.
- Find the application you want to manage.
- Click its three-dot menu.
- Select Advanced options, if available.
- Locate Background app permissions.
- Choose Never when background operation isn’t necessary.
Not every application offers this setting. Traditional desktop software often manages background activity through its own preferences. Look for options such as Launch at startup, Run in background, or Minimize to system tray.
However, restricting background operation can interrupt notifications, automatic synchronization, and scheduled tasks. For example, a cloud storage application might stop synchronizing files.
💡 Pro-Tip: Disable only a few startup applications initially. Restart Windows after each round so you can identify which changes actually improve performance.
2. Free Up Storage Space Using Windows 11 Storage Sense
Insufficient storage space can affect Windows performance, especially when your system drive approaches full capacity. Windows needs free space for updates, temporary files, application caches, and virtual memory operations.
Meanwhile, forgotten downloads, installation packages, and unnecessary applications gradually consume valuable storage. Many users overlook this problem until Windows displays a low-storage warning.
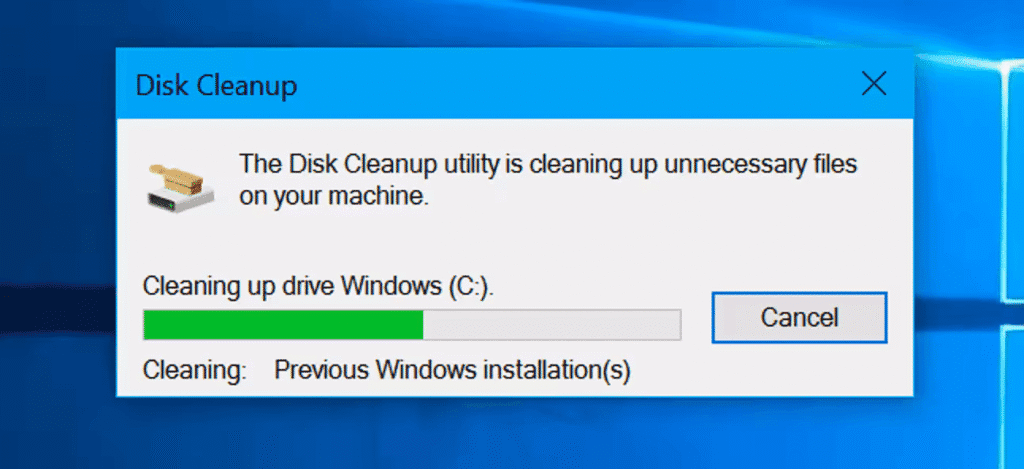
Fortunately, Windows 11 includes Storage Sense, a built-in utility for routine storage cleanup. You don’t need expensive third-party software to perform these tasks.
Fix #3: Configure Storage Sense and Remove Temporary Files
To configure Storage Sense:
- Press Windows + I to open Settings.
- Navigate to System → Storage.
- Click Storage Sense.
- Enable Automatic User content cleanup if necessary.
- Review available cleanup schedules and retention settings.
- Click Run Storage Sense now to begin a manual cleanup.
Next, return to the main Storage page and select Temporary files. Windows may display several cleanup categories, including:
- Windows Update cleanup files.
- Temporary system files.
- Thumbnails and cached data.
- Delivery Optimization files.
- Recycle Bin contents.
Review each category before selecting Remove files. Pay particular attention to the Downloads folder and any previous Windows installation files.
You can also review Settings → System → Storage → Cleanup recommendations. This feature identifies files and applications that may no longer be necessary.
Microsoft provides additional instructions in its Storage Sense configuration guide.
How Much Free Space Should You Maintain?
There’s no universal free-space percentage that guarantees faster performance. However, maintaining sufficient headroom helps Windows handle updates and temporary workloads.
As a practical guideline, consider keeping approximately 15–20% of your system drive free, when possible. This isn’t a strict Windows requirement, but it provides useful operating room.
For example, a 256 GB drive with only 5 GB remaining deserves immediate attention. Major updates and application installations may struggle with such limited space.
However, clearing storage won’t necessarily fix unrelated processor or memory bottlenecks. Storage cleanup works best when limited free space contributes to the slowdown.
⚠️ Warning: Never manually delete unfamiliar folders inside the Windows directory. Removing system files can break applications, updates, and Windows itself.
3. Uninstall Unused Software and Preinstalled Bloatware
Many new computers arrive with software their owners never requested. Manufacturers sometimes bundle promotional utilities, trial subscriptions, gaming applications, and support tools.
Some programs are harmless, while others launch background services or check for updates. Consequently, unnecessary installations can gradually increase resource consumption. Older applications may also occupy substantial disk space. Removing programs you no longer use helps simplify your system and reduce clutter.
Fix #4: Remove Unnecessary Applications
Windows 11 makes uninstalling most applications straightforward.
- Press Windows + I to open Settings.
- Navigate to Apps → Installed apps.
- Review your installed programs.
- Sort applications by size or installation date when useful.
- Click the three-dot menu beside an unnecessary application.
- Select Uninstall and follow the prompts.
- Restart Windows if necessary.
Focus on applications you recognize and no longer need. Old games, expired trialware, and duplicate utilities are reasonable candidates. However, don’t assume every manufacturer application is unnecessary. Some utilities control battery charging, firmware updates, cooling profiles, and hardware diagnostics.
Applications You Should Be Careful About Removing
Certain installed components support other programs or hardware features. Avoid indiscriminately uninstalling:
- Microsoft Visual C++ Redistributables: Many applications depend on these runtime libraries.
- Microsoft .NET components: Software may require specific runtime versions.
- Graphics and chipset drivers: These support hardware functionality and stability.
- Audio and touchpad utilities: Some provide device-specific controls.
- Security software: Understand your protection arrangements before removing it.
Also, avoid aggressive debloating scripts that remove Windows components indiscriminately. Some disable services that future updates or applications require.
When you’re unsure about a program, research its publisher and purpose first. Remember, uninstalling software doesn’t automatically improve performance. The biggest gains generally come from removing programs that consume resources unnecessarily.
4. Reduce Windows 11 Animations and Visual Effects
Windows 11 includes animations, transparency, shadows, and other visual effects. These features improve appearance but require graphics processing and system resources. Most modern computers handle these effects comfortably. However, older laptops and systems with limited graphics capabilities may struggle.
For example, opening menus or switching windows might feel sluggish during heavy workloads. Disabling unnecessary effects can make desktop interactions feel more responsive. Still, visual adjustments won’t solve serious hardware limitations. Their main benefit involves interface responsiveness rather than dramatically faster computation.
Fix #5: Adjust Windows 11 Visual Effects
Windows provides a performance configuration panel for reducing visual overhead.
- Press Windows + S to open Windows Search.
- Type Adjust the appearance and performance of Windows.
- Open the matching result.
- Select the Visual Effects tab.
- Choose Adjust for best performance.
- Click Apply, then OK.
This setting disables several visual effects simultaneously. Your desktop may look less polished, but some interactions may become quicker. Personally, I prefer selecting Custom instead. That option lets you remove unnecessary animations while preserving useful visual features. For instance, consider keeping Smooth edges of screen fonts enabled. Readable text matters more than squeezing out every possible visual effect.
Disable Animations and Transparency Separately
Windows also provides individual settings for common interface effects. To disable animations:
- Open Settings → Accessibility → Visual effects.
- Turn Animation effects off.
To disable transparency:
- Open Settings → Personalization → Colors.
- Turn Transparency effects off.
These adjustments reduce visual overhead without modifying advanced system settings. However, the actual improvement depends on your hardware. Computers with capable graphics processors may show little measurable difference.
💡 Pro-Tip: Disable animations first, then test your normal workload. If performance remains unchanged, focus on memory, storage, and CPU utilization instead.
5. Change Windows 11 Power Settings for Better Performance
Your computer’s power configuration can influence processing performance. Windows balances energy consumption against responsiveness, especially on laptops. Many computers use Balanced mode by default. This setting adjusts performance according to workload demands.
However, power-saving configurations can sometimes restrict processing performance during demanding tasks. You might notice slower calculations, reduced responsiveness, or longer application processing times. Fortunately, Windows 11 lets you adjust power preferences without installing additional software.
Fix #6: Switch to Best Performance Power Mode
To change the power mode:
- Press Windows + I to open Settings.
- Navigate to System → Power & battery.
- Locate Power mode.
- Select Best performance.
- Configure separate plugged-in and battery settings if available.
- Test your usual applications for improvement.
Windows typically offers three power modes:
- Best power efficiency: Prioritizes battery life and reduced energy consumption.
- Balanced: Provides a compromise between performance and power consumption.
- Best performance: Prioritizes processing performance when workloads require it.
Microsoft explains these choices in its Windows power mode documentation.
However, selecting Best performance doesn’t guarantee faster operation in every application. Performance gains depend on hardware capabilities and workload demands. For everyday browsing and document editing, Balanced mode often provides sufficient performance.
What If Power Mode Is Missing?
Some computers don’t display the expected power mode options. Manufacturer utilities and custom power plans can influence which settings appear. Try checking the traditional Power Options panel:
- Press Windows + R.
- Type
controland press Enter. - Open System and Security → Power Options.
- Review the available power plans.
- Select Balanced if a custom plan prevents power mode adjustments.
- Return to Windows Settings and check again.
Some systems also provide a High performance power plan. However, availability varies across hardware platforms. Remember that higher performance settings can increase heat, fan noise, and battery consumption. Excessive heat may also trigger thermal throttling and reduce processor speed.
💡 Pro-Tip: Compare the same workload using Balanced and Best performance modes. Keep the setting that provides a meaningful improvement without unnecessary heat or battery drain.
6. Update Windows 11 and Outdated Device Drivers
Outdated operating system components can cause compatibility, stability, and performance problems. Microsoft regularly releases updates addressing security vulnerabilities and reliability issues.
However, many users postpone updates because they want to avoid interruptions. Others disable updates entirely after experiencing inconvenient restarts.
While understandable, missing important fixes can create problems over time. Device drivers also require attention when specific hardware components malfunction. That said, newer drivers don’t always produce better performance. Update strategically rather than installing every available package.
Fix #7: Install the Latest Windows 11 Updates
To check for Windows updates:
- Press Windows + I.
- Navigate to Windows Update.
- Click Check for updates.
- Install available recommended updates.
- Restart your computer when prompted.
- Check again for remaining updates.
Windows may temporarily consume additional resources while installing updates. Therefore, avoid evaluating performance during active installation. Let Windows complete maintenance tasks before testing responsiveness.
Also, optional preview updates aren’t always necessary. Unless you need a particular fix, regular stable updates generally offer a better maintenance approach.
Fix #8: Update Outdated or Problematic Drivers
Device drivers allow Windows to communicate with hardware components. Graphics, storage, chipset, and network drivers can influence system behavior. Windows Update automatically delivers many recommended drivers. However, certain devices require manufacturer-specific versions.
To review optional driver updates:
- Open Settings → Windows Update.
- Select Advanced options.
- Click Optional updates.
- Expand Driver updates, if available.
- Review the available packages.
- Install updates relevant to your hardware or symptoms.
- Restart Windows if necessary.
Don’t install optional drivers indiscriminately. Some packages target specific compatibility problems rather than general performance improvements. You can also inspect hardware through Device Manager.
Right-click Start → Device Manager, then locate the relevant component. Right-click the device and select Update driver → Search automatically for drivers.
If Windows doesn’t locate an appropriate driver, check your hardware manufacturer’s official website. Microsoft provides additional instructions in its Device Manager driver update guide.
What If a Driver Update Causes Problems?
Occasionally, performance problems begin immediately after installing a new driver. In that situation, reverting to the previous version may help. Open Device Manager, right-click the affected device, and select Properties. Under the Driver tab, choose Roll Back Driver, if available. Follow the prompts and restart your computer.
💡 Pro-Tip: Record your driver version before installing major updates. This makes troubleshooting easier if the new version introduces unexpected behavior.
Avoid questionable third-party driver updater programs. Official Windows and manufacturer sources generally provide the safest starting point.
7. Scan for Malware and Hidden Resource-Hungry Threats
Malware doesn’t always announce itself through obvious warnings or suspicious pop-ups. Some malicious programs operate quietly while consuming system resources.
For example, unauthorized cryptocurrency miners can abuse CPU or GPU processing power. Other threats continuously execute background tasks or communicate with remote servers. Consequently, your computer might run hotter, experience excessive fan activity, or become unusually sluggish.
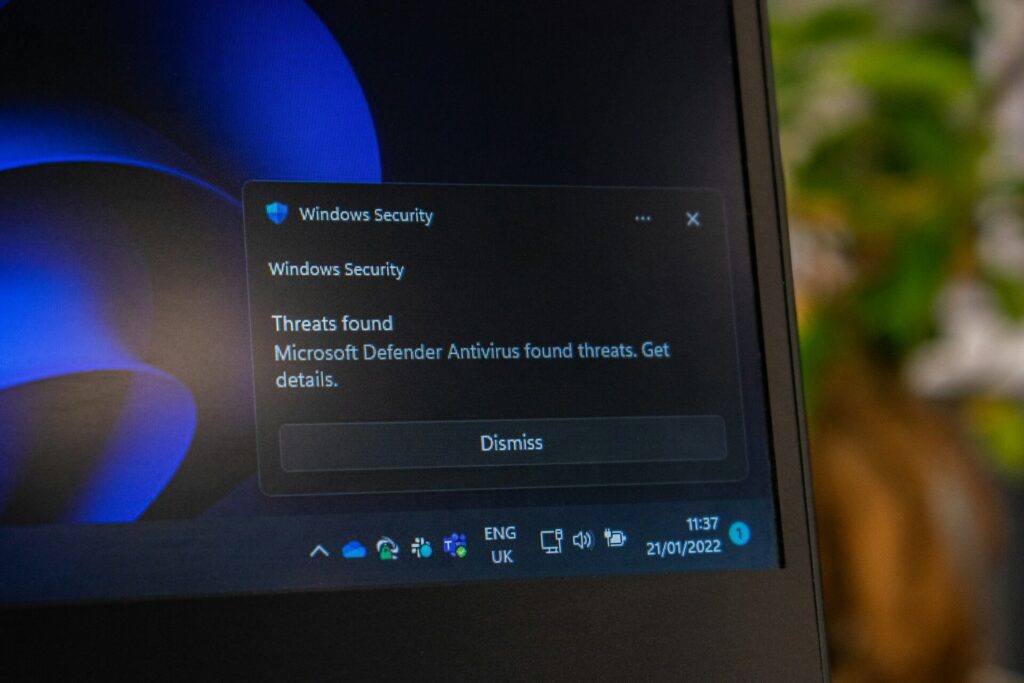
However, high resource utilization doesn’t automatically indicate malware. Legitimate updates and demanding applications can create similar symptoms. Therefore, investigate unusual behavior before assuming your computer has an infection.
Fix #9: Run a Full Scan Using Windows Security
Windows 11 includes Microsoft Defender Antivirus, accessible through Windows Security. To perform a Full scan:
- Press Windows + S and search for Windows Security.
- Open Virus & threat protection.
- Check for current security intelligence updates.
- Select Scan options.
- Choose Full scan.
- Click Scan now.
- Review the results after scanning completes.
A Full scan examines files and applications throughout your computer. The process may take considerable time, depending on storage capacity and file count. Scanning also temporarily increases CPU and disk activity. Schedule it when you don’t need maximum system performance.
If Defender identifies threats, follow its recommended actions. Restart Windows when necessary. For suspicious files, Microsoft also explains how to scan individual files and folders using Windows Security.
Use Microsoft Defender Offline for Persistent Threats
Some malware attempts to hide while Windows operates normally. In these situations, an offline scan may help.
- Open Windows Security → Virus & threat protection.
- Select Scan options.
- Choose Microsoft Defender Antivirus (offline scan).
- Click Scan now.
- Save your work and confirm the restart.
- Allow the offline scan to finish.
Microsoft Defender Offline scans your computer outside the normal Windows desktop environment. This reduces opportunities for certain threats to interfere. If your computer uses BitLocker, ensure you can access its recovery key before proceeding.
Afterward, review Protection history for the results. Microsoft documents the process in its malware detection and removal troubleshooting guide.
⚠️ Warning: Never disable antivirus protection simply to make Windows faster. Removing essential security controls can expose your computer to serious threats.
8. Optimize Your SSD or Hard Drive Correctly
Storage performance strongly influences how responsive Windows 11 feels. Even a capable processor can struggle when the system drive becomes a bottleneck.
However, mechanical hard drives and solid-state drives require different maintenance approaches. Traditional HDDs store data on spinning platters. SSDs access flash memory electronically without moving mechanical components. Because of these differences, Windows uses different optimization methods for each drive type.
Fix #10: Use Windows Optimize Drives
Windows 11 includes a built-in drive optimization utility.
- Press Windows + S.
- Search for Defragment and Optimize Drives.
- Open the application.
- Locate your system drive, usually C:.
- Check its Media type.
- Select the drive and click Optimize.
- Review the scheduled optimization settings.
For mechanical hard drives, Windows may perform defragmentation. This reorganizes fragmented file data to improve access efficiency.
For supported SSDs, Windows primarily performs TRIM operations during routine optimization. TRIM identifies storage blocks containing data the operating system no longer needs. This helps the SSD manage future write operations more efficiently.
Should You Manually Defragment an SSD?
Traditional defragmentation offers little benefit for ordinary SSD file access. SSDs don’t need mechanical heads to move between file fragments. Fortunately, Windows recognizes supported drive types and performs appropriate maintenance. Its built-in tools may occasionally perform additional optimization when necessary.
Therefore, avoid repeatedly forcing traditional defragmentation through third-party utilities. Also, remember that optimization cannot repair failing hardware. Watch for warning signs such as persistent storage errors, unusually slow transfers, and frequent freezes. Mechanical drives might also develop unusual clicking or grinding noises.
Certain NVMe SSDs expose health information through Settings → System → Storage → Advanced storage settings → Disks & volumes. However, availability varies by device and storage interface.
💡 Pro-Tip: If your storage drive shows signs of failure, back up your files immediately. Don’t rely on defragmentation or optimization to repair physical deterioration.
9. Upgrade Your RAM to Reduce Memory Bottlenecks
Sometimes, software changes aren’t enough to improve Windows 11 performance. Your computer might simply lack sufficient memory for your workload. Random Access Memory (RAM) temporarily stores information that running applications need.
When physical memory becomes insufficient, Windows relies more heavily on virtual memory. It may move some memory contents into a disk-backed page file. Although this keeps applications functioning, storage access is generally slower than RAM access. Consequently, excessive paging can make multitasking noticeably sluggish.
Fix #11: Upgrade RAM When Memory Pressure Becomes Excessive
Before buying additional RAM, determine whether insufficient memory contributes to your slowdown.
- Press Ctrl + Shift + Esc.
- Select Performance → Memory.
- Check your installed memory capacity.
- Observe current memory utilization.
- Open your usual applications.
- Monitor usage while performing demanding tasks.
Look for consistently high memory usage during normal workloads. Frequent paging and sluggish application switching strengthen the case for additional RAM.
However, high memory usage alone doesn’t always indicate trouble. Windows also uses available memory for caching. Therefore, evaluate actual responsiveness alongside memory utilization.
How Much RAM Does Windows 11 Really Need?
The right amount depends on your applications and multitasking habits.
| RAM | Practical use |
|---|---|
| 4 GB | Minimum supported capacity, but very restrictive |
| 8 GB | Basic browsing and light office work |
| 16 GB | Comfortable everyday productivity and multitasking |
| 32 GB | Virtual machines, creative software, and heavier workloads |
| 64 GB+ | Specialized memory-intensive applications |
For many users experiencing memory pressure with 8 GB, upgrading to 16 GB makes practical sense. For example, running numerous browser tabs alongside Teams and Excel can consume substantial memory. However, upgrading from 16 GB to 32 GB won’t necessarily improve a light workload. More RAM helps most when insufficient capacity causes the bottleneck.
Check Memory Compatibility Before Upgrading
Not every computer supports user-replaceable RAM. Many thin laptops include soldered memory that cannot be upgraded. Before purchasing modules, check:
- Memory generation: DDR4, DDR5, or another supported standard.
- Maximum capacity: Manufacturer and platform limitations.
- Available slots: Empty slots versus modules requiring replacement.
- Form factor: Laptop SO-DIMM or desktop DIMM.
- Supported speeds: Processor and motherboard specifications.
Also, check whether your computer supports dual-channel memory operation. Suitable module configurations can improve bandwidth-sensitive workloads.
💡 Pro-Tip: If your computer already has 16 GB of RAM, investigate other bottlenecks first. Additional memory won’t solve problems caused by failing storage or overheating.
10. Replace an Aging Hard Drive with a Faster SSD
If your Windows 11 computer still uses a mechanical hard drive, storage may be its biggest limitation. Traditional HDDs remain useful for inexpensive mass storage. However, they struggle with frequent small read/write operations.
Windows constantly accesses application files, temporary data, and system components. Mechanical drives must physically reposition their read/write heads to retrieve information. These movements create delays that even a capable processor cannot eliminate.
Replacing an HDD with an SSD can significantly improve everyday responsiveness. For many older computers, this upgrade produces more noticeable results than minor software tweaks.
Fix #12: Upgrade Your System Drive to an SSD
Solid-state drives retrieve information electronically rather than through moving mechanical parts. Consequently, SSDs generally offer lower latency and stronger random I/O performance. This difference matters during Windows startup, application launches, and everyday file operations.
However, SSD upgrades won’t necessarily accelerate tasks limited by CPU or graphics processing.
HDD vs. SATA SSD vs. NVMe SSD
Different storage technologies offer different performance characteristics.
| Storage type | Approximate sequential read speed |
|---|---|
| 7200 RPM HDD | 100–200 MB/s |
| SATA SSD | 450–550 MB/s |
| PCIe 3.0 NVMe SSD | Up to around 3,500 MB/s |
| PCIe 4.0 NVMe SSD | Up to around 7,000 MB/s |
These figures represent approximate capabilities rather than guaranteed results. Actual performance depends on hardware, interface limitations, and workload characteristics. Sequential speeds also don’t tell the entire story. Random access latency often matters more for everyday Windows responsiveness.
For example, replacing an HDD with a SATA SSD can dramatically improve an older laptop. However, moving from SATA SSD to NVMe may deliver smaller gains during basic office work.
Check Compatibility Before Purchasing an SSD
Many older laptops use 2.5-inch SATA drives. These systems can often accept compatible 2.5-inch SATA SSDs. Newer computers may use M.2 slots supporting SATA or NVMe storage.
Importantly, M.2 describes a physical form factor, not a guarantee of NVMe compatibility. Check manufacturer documentation before ordering replacement storage. Also, verify physical access and supported drive dimensions.
Clone Windows or Perform a Clean Installation?
After choosing a compatible SSD, you have two main migration options.
Option 1: Clone your existing drive.
Disk cloning transfers Windows, installed applications, settings, and personal files to another drive. This reduces software reinstallation work. However, cloning can also preserve existing configuration problems.
Option 2: Perform a clean Windows 11 installation.
A clean installation creates a fresh operating system environment. This avoids carrying unnecessary programs and obsolete configurations into the replacement system. However, you’ll need to reinstall applications and restore personal files.
For installation media, use Microsoft’s official Windows 11 download page.
Protect Your Data Before Replacing Storage
Regardless of your migration method, create a complete backup first. Include important documents, photographs, email archives, browser data, and software license information.
If your drive uses BitLocker or device encryption, secure the recovery key beforehand. Whenever possible, keep the original drive intact until the replacement works correctly.
⚠️ Warning: Never erase your original drive before verifying successful migration. Confirm that Windows starts correctly and important files remain accessible.
💡 Pro-Tip: For older PCs still using mechanical hard drives, prioritize an SSD upgrade over cosmetic performance tweaks.
Final Thoughts: Keep Windows 11 Fast Without Risky Tweaks
A slow Windows 11 computer doesn’t automatically mean you need a replacement. In many cases, unnecessary background applications, limited storage, or outdated software contribute to poor performance.
Fortunately, Windows includes several tools that help identify and resolve common problems. Start with Task Manager, reduce unnecessary startup activity, and remove applications you no longer use.
Next, review storage space, install relevant updates, and check for malware. These steps address common software-related issues without requiring additional hardware.
If performance remains poor, investigate memory pressure and storage limitations. Upgrading RAM or replacing an HDD with an SSD can provide meaningful improvements when hardware creates the bottleneck. However, avoid changing everything simultaneously. Make one adjustment, test your workload, and observe the results before proceeding.
Also, avoid questionable PC cleaners, aggressive registry tweaks, and scripts that disable essential Windows services. Such shortcuts can create problems that outweigh any potential benefits. For ongoing maintenance, review startup applications, monitor storage usage, and keep essential software updated.
Ultimately, Windows 11 optimization works best when you identify and remove actual bottlenecks. A carefully maintained computer often performs better than one overloaded with unnecessary optimization utilities.
What’s Slowing Down Your Windows 11 PC?
Are you dealing with slow startup times, high memory usage, freezing applications, or constant disk activity? Which of these 12 fixes made the biggest difference on your computer?
Share your experience in the comments below! Include your computer’s specifications and describe the problems you’ve encountered. Your findings might help another reader troubleshoot a similar issue.
If this guide helped you speed up your PC, share it with friends, colleagues, or family members experiencing Windows 11 performance problems. For more practical Windows tutorials, computer troubleshooting guides, and hardware advice, visit Technical Forum.