Microsoft recently released the Windows 11 July update, which brings advanced recovery options to users. Consequently, many tech enthusiasts eagerly searched for the new Windows 11 Point-in-Time Restore feature. However, many users noticed a frustrating issue after installing this package. The critical option is either completely missing or grayed out in their recovery control settings.
This new recovery tool stems from the Microsoft Windows Resiliency Initiative program. Microsoft designed this architecture to protect modern devices from severe boot failures. For example, it helps machines recover from broken kernel-mode updates. Therefore, fixing this feature is vital for long-term system stability. This comprehensive troubleshooting guide will help you resolve this problem quickly.
Why Is Point-in-Time Restore Missing or Grayed Out?
The 200 GB Storage Threshold Rule
Microsoft configures this option based on your primary system drive size. Consequently, the operating system enables it automatically only on large drives. Your main system drive must have at least 200 GB of total storage space. If your solid-state drive is smaller, Windows disables the option by default. Therefore, users with small storage drives will find the option turned off initially.
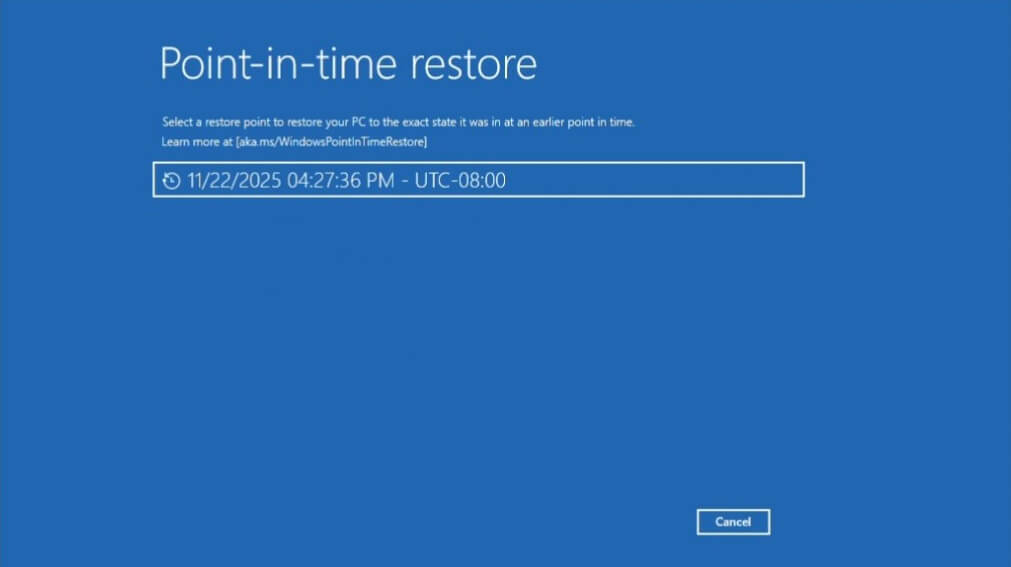
Fortunately, you can still turn this feature on manually through the settings menu. However, you must ensure that your system has enough actual free space available. The recovery engine requires extra disk space to store daily system snapshots safely. If your drive runs low on storage, the operating system grays out the toggles immediately.
Windows 11 Edition Limitations
Your specific operating system edition determines which configuration settings you can modify. For instance, retail versions like Windows 11 Home and Pro enable basic snapshots automatically. However, the advanced customization options remain completely locked out on these specific retail versions.
⚠️ Warning: The options for snapshot frequency and retention periods are grayed out by design on Home and Pro editions. Only enterprise administrators can modify these advanced underlying parameters through specific deployment tools. Do not attempt to force-enable these grayed-out sub-settings using unapproved third-party hacking tools.
Outdated Windows Build Versions
This innovative recovery mechanism requires the latest platform architecture to function correctly. Specifically, you must run Windows 11 version 24H2 or a newer build on your machine. Older platform releases do not contain the underlying snapshot infrastructure. Thus, checking your platform update history is a necessary troubleshooting step.
Sometimes, a staging phase delays the appearance of new administrative features. Microsoft often rolls out core features using controlled feature rollouts. Therefore, your system might need an additional minor configuration update to display the menu.
Damaged Windows Recovery Environment
The snapshot restoration process operates entirely within the isolated Windows Recovery Environment (WinRE) space. Consequently, a broken or missing WinRE partition will break the feature completely. If your recovery partition is corrupt, the settings app disables the user interface.
Many users disable WinRE inadvertently while optimizing their storage layouts. Additionally, third-party disk partitioning tools can accidentally break the recovery link. Therefore, rebuilding your local recovery environment often resolves the issue.
Step-by-Step Fixes for Point-in-Time Restore
Method 1: Enable the Feature Manually via Settings
If your hard drive is smaller than 200 GB, you must activate the service yourself. Follow these steps to access the hidden configuration settings:
- Click the Start menu button and select the Settings gear icon.
- Navigate immediately to the System tab on the left sidebar.
- Scroll down the right pane and click on the Recovery option.
- Locate the area labeled Point-in-Time Restore on the screen.
- Click the button marked View or edit next to the setting.
- Toggle the primary feature switch to the On position manually.
After you flip this switch, Windows will immediately start tracking system changes. However, remember that the secondary options below it will remain grayed out. As noted previously, this behavior is normal for standard consumer versions of Windows.
Method 2: Verify and Repair Your WinRE Status
You must ensure that your recovery environment functions perfectly. To check and fix your WinRE status, use the administrative command line interface:
- Type cmd directly into your Windows taskbar search box.
- Right-click the Command Prompt result and choose Run as administrator.
- Type
reagentc /infointo the window and press the Enter key. - Look closely at the Windows RE status line in the output.
DOS
reagentc /infoIf the status line displays Disabled, you must activate it immediately. Type reagentc /enable into the prompt and hit Enter. Consequently, Windows will re-link your recovery partition to the main operating system.
DOS
reagentc /enableIf you receive an error stating the image was not found, you have a deeper issue. You might need to extract the Winre.wim file from an official installation ISO. Then, you can place it back into the correct system directory manually.
Method 3: Fix Group Policy and Registry Blockers
Enterprise-managed computers often block local system restoration changes through corporate policies. However, local administrators can override these restrictions using the Registry Editor.
- Press the Windows Key + R shortcut together to open Run.
- Type regedit into the empty box and click the OK button.
- Navigate directly to the following registry path inside the editor:
HKEY_LOCAL_MACHINE\SOFTWARE\Policies\Microsoft\Windows NT\SystemRestore - Look for values named DisableConfig or DisableSR in the right pane.
- Right-click these specific registry values and choose Delete from the menu.
💡 Pro-Tip: Always create a manual registry backup before deleting any system keys. Click File, select Export, and save the backup file to your desktop safely. This step ensures you can recover quickly if you make an error.
Method 4: Use PowerShell to Force-Enable System Protection
Sometimes, the graphical user interface fails to apply your requested configuration changes. In these specific situations, you can use advanced administrative PowerShell commands instead.
- Right-click the Start button and select Terminal (Admin).
- Ensure you open a secure PowerShell tab inside the terminal window.
- Type the following command exactly to activate backup capabilities:
Enable-ComputerRestore -Drive "C:\" - Press Enter to execute the command on your system drive.
PowerShell
Enable-ComputerRestore -Drive "C:\"Subsequently, restart your personal computer to apply these low-level modifications. Check the standard recovery settings menu again to verify the current status. The Point-in-Time Restore missing issue should now be fully resolved.
Point-in-Time Restore vs. Legacy System Restore
Many regular users confuse this new architecture with the ancient Control Panel recovery tool. However, these two utilities function entirely differently under the hood. The legacy System Restore tool debuted originally in Windows Me during the year 2000. It tracks driver installations and major update packages selectively.
| Feature Capabilities | Legacy System Restore | New Point-in-Time Restore |
| Default Status | Often disabled by default | Enabled on drives $\ge$ 200 GB |
| Snapshot Type | Selective system files | Full state snapshots |
| User File Impact | Ignores local user profiles | Can roll back local user files |
| Storage Location | System Volume Information | Isolated recovery container |
The modern solution takes comprehensive daily snapshots of the entire system state. Furthermore, it safeguards your machine against catastrophic boot sector corruption. Because of this design, it offers significantly better protection during major update cycles.
You can read more about these distinct structural differences on the official Microsoft Support Portal website. Alternatively, technical deep dives are available on major technology news sites like ZDNet. Utilizing both tools simultaneously provides the best possible defense against data loss.
Final Thoughts
The Windows 11 July update introduces an incredible safety net for your operating system. Nonetheless, software deployment bugs and drive size limitations can occasionally hide this tool. By verifying your storage capacity and repairing WinRE, you can easily enable Point-in-Time Restore capabilities. This ensures your computer remains resilient against unexpected software crashes.
Did this comprehensive guide help you restore your missing configuration options? Let us know which specific troubleshooting step solved your issue in the comment section below! Please share this helpful article with your friends and fellow tech enthusiasts on social media to spread the word.