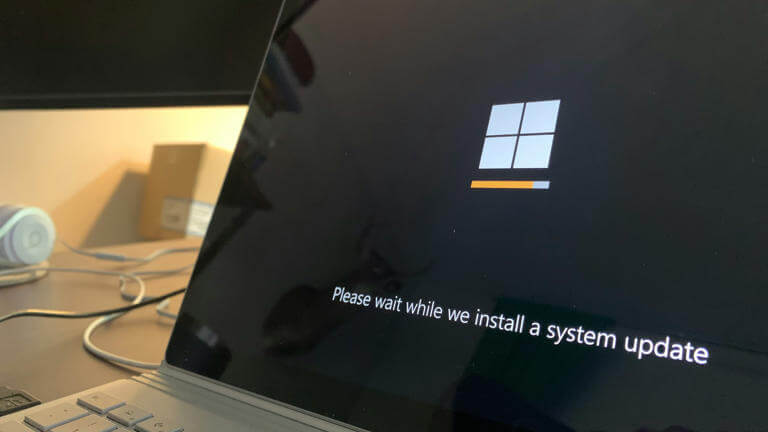
Welcome back to technicalforum.org! Windows updates provide critical security patches and exciting new desktop features for your operating system. However, users frequently encounter frustrating barriers when trying to install these vital operating system improvements.
Nothing tests your technical patience quite like a frozen installation progress bar or an ambiguous hexadecimal error code. Consequently, millions of PC users face a Windows 11 update failed message during their routine weekly maintenance. This comprehensive, expert-approved walkthrough provides clear solutions to bypass these stubborn Windows 11 installation errors efficiently.
Why Do These Installation Flaws Happen?
Understanding the underlying root causes saves massive amounts of time during your technical diagnostic process. Microsoft frequently rolls out massive cumulative patches that require substantial local system resources to deploy successfully. Therefore, minor underlying system instabilities can easily cascade into total deployment failures during the configuration process.
Corrupted system update caches stand as a primary culprit behind broken installations on modern computers. Specifically, network interruptions can corrupt downloaded system files while they transition to your local drive. When the operating system attempts to unpack these broken installer packages, the entire sequence halts immediately.
Hardware compatibility issues also trigger unexpected system rollbacks during major software deployment phases. For example, outdated peripheral drivers or restrictive security chip settings can block critical update paths completely. Recognizing these specific infrastructure blocks allows you to target the actual breakdown point directly.
Initial Pre-Checks Before Complex Troubleshooting
You must perform basic system verification before editing deeper registry settings or running advanced terminal scripts. First, ensure your device maintains a constant, completely stable connection to your local internet router. Wi-Fi drops frequently corrupt large asset downloads, so switching to a physical ethernet cable yields better stability.
Second, verify that your primary system storage drive possesses adequate free space for file expansion. Microsoft recommends keeping at least 64 gigabytes of available storage for major feature rollouts. Therefore, running the native disk cleanup utility can instantly resolve many superficial deployment bottlenecks.
Warning: Never shut down your computer power manually while an active update configuration screen is processing. Forcing a hard reset during deep system writes can corrupt your master boot record beyond simple repair.
Fixing Windows 11 Update Failed Issues with Native Tools
Microsoft includes dedicated diagnostic utilities within the core operating system framework to fix common deployment issues automatically. The integrated troubleshooter offers an incredibly efficient starting point for repairing broken background download services.
Deploying the Windows Update Troubleshooter
To launch this automated repair wizard, navigate directly to your primary system settings application. Choose the system category, then select the dedicated troubleshoot option from the right panel. Next, click on additional troubleshooters and locate the specific Windows Update launcher tool.
Click the run button to initiate an automated scan of your entire background service infrastructure. This utility actively verifies your network registration status and checks key background service configurations. Furthermore, it automatically repairs minor database corruptions without requiring any manual data manipulation from you.
Resetting Corrupted Update Caches Manually
If the automated wizard fails to resolve the issue, you must purge the software distribution cache folder manually. This directory stores temporary installer files that frequently experience deep corruption during active network transfers. To safely wipe this folder, you must first suspend all active background update mechanisms.
Open your command prompt with administrative privileges by right-clicking the application icon. Then, input the following terminal commands sequentially to halt your core background update infrastructure:
DOS
net stop wuauserv
 net stop cryptSvc
 net stop bits
 net stop msiserver
After stopping these core operations, open your file explorer and navigate directly to the root Windows directory. Locate the folder named SoftwareDistribution and rename it completely to SoftwareDistribution.old to isolate it. Similarly, navigate to the System32 directory and rename the catroot2 folder to catroot2.old for total isolation.
Finally, return to your administrative command terminal to reactivate the vital background services you recently paused. Execute these startup commands to force the operating system to construct completely fresh cache folders:
DOS
net start wuauserv
 net start cryptSvc
 net start bits
 net start msiserver
Resolving Windows 11 Installation Errors via System File Scans
Persistent deployment failures often point directly to compromised core system components within your local directory. When critical system files become corrupt, the local installer engine loses its ability to modify target directories safely. Fortunately, built-in command-line tools can restore these foundational system assets to their factory defaults.
Running the Deployment Image Tool
The Deployment Image Servicing and Management utility downloads authentic replacement assets directly from official cloud servers. Therefore, you must establish an active internet connection before initiating this deep cloud-based repair sequence. Open your administrative terminal and input this precise repair string to begin execution:
DOS
DISM.exe /Online /Cleanup-image /Restorehealth
The utility will cross-reference your local system structures with official online binaries to find discrepancies. This comprehensive scanning process often takes several minutes depending on your hard drive speed. Do not close the window until the progress meter reports absolute completion of the operation.
Executing the System File Checker
Once the cloud image utility finishes repairing your master deployment package, you should run the System File Checker. This tool scans all protected system assets and replaces damaged components using the freshly repaired local image cache. Input this straightforward command into your open administrative terminal layout:
DOS
sfc /scannow
The system will report whether it successfully discovered and repaired any deep internal asset corruptions. Restart your computer immediately after the scan concludes to save all newly applied file changes permanently.
Addressing Core Windows Update Errors with Driver Adjustments
Outdated device software frequently triggers abrupt installation rollbacks to prevent total hardware incompatibility issues. Specifically, graphics card drivers and network adapters cause severe deployment conflicts if they lack modern optimization patches. You can review detailed technical data logs regarding these errors on the official Microsoft Learn Platform.
Open your device manager application to inspect the current stability status of your internal components. Look for any bright yellow warning triangles next to your listed hardware entries. Right-click those specific problematic components and select the option to update drivers automatically through online channels.
Pro-Tip: Manually download the latest chipset and GPU drivers directly from your specific motherboard manufacturer’s website. Using official vendor packages prevents the installation tool from encountering unexpected driver signature mismatches mid-cycle.
How to Bypass Complex System Update Blocks and Error Code Loops
Stubborn error codes like 0x800f081f or 0x80070002 require alternative deployment methodologies to bypass successfully. If the standard settings application continues to fail, you can bypass the traditional update loop completely.
| Common Error Code | Probable Root Cause | Recommended Action |
| 0x80240020 | Corrupted session cache files | Rename SoftwareDistribution folder |
| 0x800F081F | Missing source files in package | Run DISM cloud restoration command |
| 0x80070070 | Insufficient storage space on drive | Run disk cleanup to clear space |
| 0x00000005 | Access denied by security software | Temporarily disable third-party antivirus |
Using the official Microsoft Update Catalog lets you download isolated standalone patches directly to your desktop. Simply copy your target error package code from your windows update menu screen. Then, paste that specific string into the search interface on the official Microsoft Update Catalog Website to find the direct installer.
Download the standalone package that perfectly matches your specific computer architecture layout. Double-click the downloaded executable asset to launch an isolated installer sequence that bypasses traditional background channels. This direct delivery mechanism successfully resolves the vast majority of persistent installation blockages.
Overcoming Deep Upgrade Halts and Setup Failures
Major version migrations sometimes freeze completely due to restrictive local third-party security software configurations. Aggressive antivirus suites frequently misidentify temporary installation scripts as potential malware threats during system modification phases. Consequently, they lock down vital system directories right when the installer requires unrestricted administrative write access.
To resolve this conflict, temporarily disable your real-time antivirus shields through their respective settings menus. Remember to re-enable your security software immediately after your system finishes configuring the new updates. For additional technical support and community advice on stubborn software interactions, consult the active Microsoft Community Forum.
If installations still fail, try disconnecting all non-essential external storage drives and USB peripherals entirely. External media components can confuse the boot manager during the multiple reboot sequences required by installers. Keeping your physical setup minimalist during the upgrade window minimizes peripheral driver conflicts.
Deploying the Windows 11 Media Creation Tool as a Final Option
When all internal troubleshooting mechanisms fail, an in-place upgrade offers the most definitive resolution strategy. This advanced process replaces your entire operating system framework while preserving all personal files and applications. To track new operating system developments and upcoming patch news, visit the official Windows Blog.
First, visit the official Microsoft Software Download Page to acquire the native creation software utility. Launch the downloaded tool and select the option to upgrade this computer immediately. Ensure you explicitly check the option that commands the installer to retain your files and programs.
The installer will download a completely fresh copy of the latest system framework files directly to your drive. It will then weave your existing personal data into the brand-new system build seamlessly. This exhaustive process effectively wipes out persistent background bugs without risking your personal data libraries.
1.Download the tool: Requires internet access.
Visit the official Microsoft download page and grab the Media Creation Tool executable.
2.Launch setup: Requires administrator rights.
Run the downloaded tool and accept the standard software licensing terms to proceed.
3.Select upgrade path: Crucial for data safety.
Choose the ‘Upgrade this PC now’ option and carefully verify that ‘Keep personal files and apps’ is checked.
4.Execute installation: Takes 20-40 minutes.
Allow the system to run through its automated reboot phases without interrupting your computer’s power supply.
Final Thoughts
Encountering a persistent update failure message can feel incredibly disruptive to your daily productivity flow. However, systematically working through native troubleshooters, cache purges, and system file repairs resolves almost every common configuration error. Transitioning to standalone installer packages or utilizing the media creation tool provides a foolproof fallback for exceptionally stubborn errors.
Which specific troubleshooting step finally cleared your stubborn upgrade progress loop today? Do you have an unlisted error code that continues to block your system deployment? Drop a comment below to share your experiences, ask questions, or connect with our tech community!