Modern personal computers increasingly ship with dedicated hardware designed to handle complex artificial intelligence workloads. If you recently purchased a Copilot+ PC or a modern machine featuring an AMD Ryzen AI, Intel Core Ultra, or Snapdragon X series processor, your device contains a Neural Processing Unit. This local NPU Windows 11 powerhouse promises to revolutionize how your system processes AI tasks.
Instead of sending every single data packet to remote cloud servers, local processing promises to deliver immediate responses. However, many users quickly discover that Windows 11 still defaults to routing many Microsoft 365 and Teams tasks directly to the cloud. This behavior consumes valuable network bandwidth and raises potential data privacy concerns.
This technical guide will walk you through the practical steps required to force Windows 11 to prioritize your physical NPU for daily collaboration workloads.
Understanding the Local NPU Shift in Windows 11
Historically, artificial intelligence required massive data centers to handle the heavy mathematical lifting. But modern chips change this equation by introducing localized, highly efficient silicon. The Windows 11 NPU is purpose-built to run machine learning math, specifically matrix multiplication, at a fraction of the power required by a traditional CPU or GPU.
When you run an AI task in Microsoft 365, the system makes a routing decision. By default, complex cloud-based features like M365 Copilot local processing are actually hybrid. They send your writing prompts and document structures to Azure servers while keeping smaller tasks on your desk.
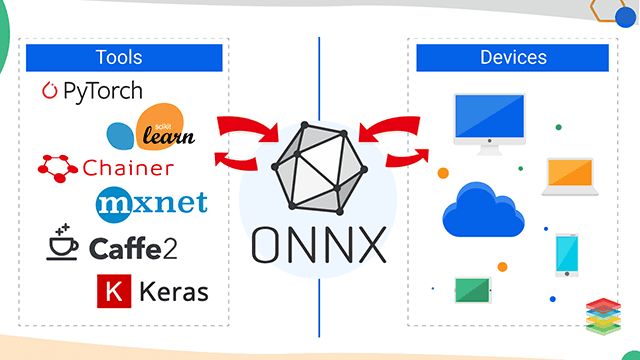
Microsoft leverages tools like the ONNX Runtime to bridge this gap, allowing desktop applications to communicate directly with local hardware. If you do not configure your environment correctly, your high-end processor will simply sit idle while your internet connection bottlenecks your workflow.
Step 1: Optimize Windows Studio Effects for Microsoft Teams
The most immediate way to witness your local NPU in action is through Windows Studio Effects during video calls. Microsoft Teams offloads heavy video processing, such as portrait blur, eye contact adjustment, and voice focus, directly to the physical chip.
To ensure Microsoft Teams hardware acceleration is fully active, you must configure the OS-level camera settings rather than relying solely on the in-app software filters.
- Press the Windows Key + I to open the Settings application.
- Navigate to Bluetooth & devices on the left-hand menu, then select Cameras.
- Click on your primary webcam under the Connected cameras list.
- Locate the Windows Studio Effects submenu.
- Toggle on Background effects (such as Portrait Blur) and Eye Contact.
- Open Microsoft Teams, click on the three dots (Settings) next to your profile picture, and navigate to Devices.
- Ensure that the camera selected is using the system-default “Windows Studio Effects” camera driver instead of a generic software override.
By utilizing the OS-level controls, Windows 11 bypasses the CPU-heavy Teams video filters and routes the mathematical calculations directly to your NPU.
Step 2: Configure Group Policy for Local AI Processing
If you are running Windows 11 Pro, Enterprise, or Education, you can utilize the Local Group Policy Editor to restrict cloud-based AI processing. This forces local fallbacks wherever supported.
- Press Windows Key + R, type
gpedit.msc, and press Enter. - Navigate to the following path:
User Configuration > Administrative Templates > Windows Components > Windows AI - Locate the policy named Turn off cloud-based AI processing or Configure local AI execution (depending on your Windows 11 build).
- Double-click the policy, select Enabled, and click Apply.
⚠️ Warning: Disabling cloud-based AI processing altogether will restrict some advanced M365 Copilot features that require large cloud-based LLMs. Only implement this policy if you strictly prioritize data privacy and wish to force local model execution using tools likeMicrosoft Foundry Local.
Step 3: Edit the Registry to Prioritize Local Runtime Libraries
For Windows 11 Home users, or those looking to tweak how the OS handles local AI processing via the Windows Copilot Runtime, the Windows Registry provides granular control. We can explicitly tell the system to prioritize local execution blocks.
- Press Windows Key + R, type
regedit, and press Enter to open the Registry Editor. - Navigate to the following key path:
HKEY_LOCAL_MACHINE\SOFTWARE\Policies\Microsoft\Windows - Right-click the Windows folder, select New > Key, and name it
WindowsAI. - Select your new
WindowsAIkey, right-click the empty pane on the right side, and select New > DWORD (32-bit) Value. - Name this new value
ForceLocalInferenceOnly. - Double-click
ForceLocalInferenceOnlyand change its value data from0to1. - Restart your computer to apply the architectural shift.
Step 4: Verify NPU Activity in Task Manager
Once you configure your system, you should actively verify that your system routes the AI workloads correctly. Microsoft updated Windows 11 to include comprehensive NPU monitoring directly within the OS management tools.
- Right-click the taskbar and select Task Manager (or press Ctrl + Shift + Esc).
- Click on the Performance tab on the left-side panel.
- Look for the NPU section in the list of hardware components.
- Open Microsoft Teams and start a test call with Windows Studio Effects turned on.
- Observe the NPU utilization graph. If the percentage spikes while CPU utilization remains low, your routing configuration is successfully active.
For developers and advanced users running custom local workflows, keeping an eye on this graph helps determine if the Windows Copilot+ AI components are engaging properly.
Final Thoughts
Configuring Windows 11 to prioritize local hardware represents a major step toward decentralized, private, and highly responsive personal computing. While cloud hybrid models still dominate massive enterprise workloads, taking control of your local NPU ensures you extract the maximum possible value from your hardware investment. Enjoy lower latency, reduced battery drain, and robust privacy on your local device today.
💡 Pro-Tip: Always keep your GPU and chipset drivers updated directly from your hardware manufacturer (Intel, AMD, or Qualcomm). Windows Update often deploys older, generic driver blocks that do not fully support the latest local ONNX runtime acceleration features.
Share Your Thoughts!
Have you successfully offloaded your Teams workflows to your device’s physical processor? Are you noticing a difference in your system’s thermals or battery life? Let us know your experience in the comments section below, and do not forget to share this article with fellow IT professionals!