When you are using Windows 7 or Vista, you might notice that when you open your Explorer window by going to Start => Computer, the explorer window shows shortcut icons for selected programs.

By shortcuts, I mean program launchers – icons that launch the programs when double clicked. These programs actually manage their entry to the “Network location” shortcuts during installation.
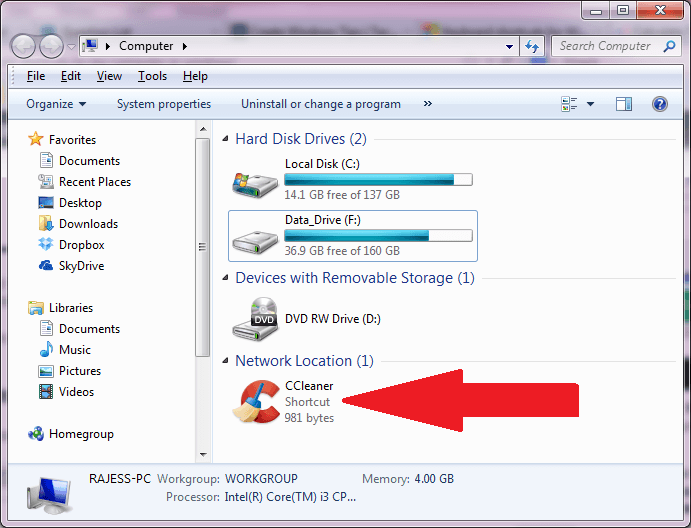
But if you want to add shortcuts to your comonly used programs in this location of the “Computer” window, you can do it manually. The steps are described below:
Step 1: Open the RUN dialog box. You can press Windows Key + R to launch it. You can also click on Start => All Programs => Accessories => RUN. Or lastly, you can click on Start => Search and in the search box, type RUN then press Enter key.
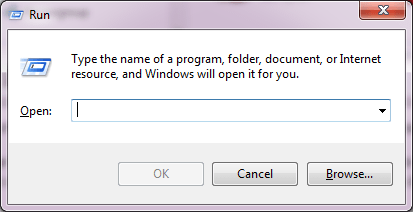
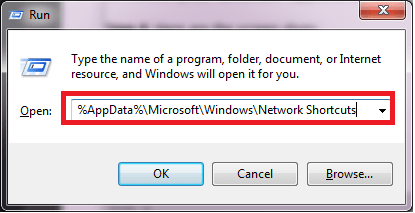
Step 2: In the RUN box, copy and paste this path:
%AppData%\Microsoft\Windows\Network ShortcutsStep 3: Then click on the OK button. Then you shall get a new explorer window with the actual user path of:
C:\Users\your-username\AppData\Roaming\Microsoft\Windows\Network ShortcutsStep 4: Here are the screen shots:
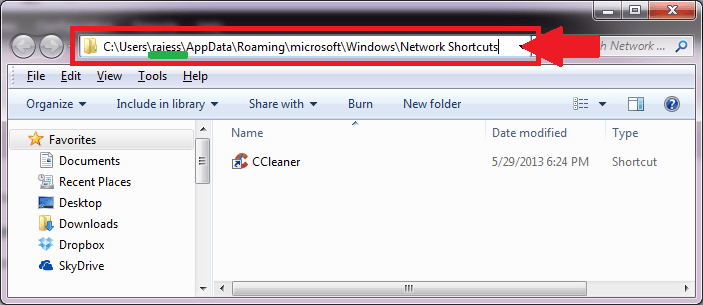
Step 5: When you are in the window similar above, you are in the right place. You can now ADD a shortcut or program launcher to your favorite programs. In my sample above, I added my maintenance and cleanup tool from http://piriform.com, CCleaner.
Step 6: To add your program, click on the File menu above, point to New, then click on “Shortcut”
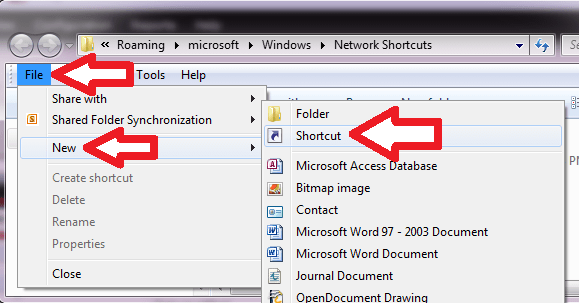
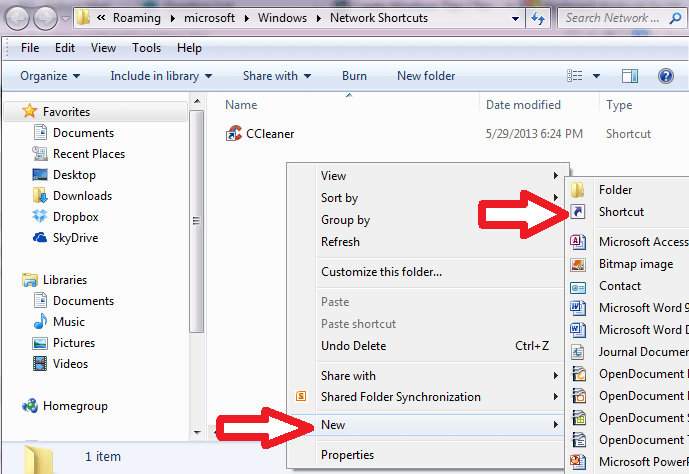
Step 7: If you do not have the File menu at the top of your Explorer window, you need to enable it. Here is the LINK for the procedures. Another way to get the Shortcut dialog without using the File menu, simply right-click on any vacant space in the folder. In the context menu, point to New, then click on Shortcut.
Step 8: In the Create Shortcut dialog box, use the Browse button to locate the program that you want to create a shortcut with. You just need to know where the program is actually stored. Most programs are normally stored in Drive C, Program Files or Program Files (x86) folders.
Step 9: When the shortcut is finally created, it will show up at the button of the Computer window.