
A constantly high CPU usage in Windows 11 can slow your PC, overheat components, and reduce battery life on laptops. While hardware upgrades are one solution, not everyone has the budget for that. Fortunately, you can fix most CPU issues using built-in tools and a few smart tweaks.
Many users unknowingly run background processes, outdated drivers, or misconfigured system settings that eat up processing power. In this guide, we’ll walk you through proven methods to reduce CPU usage—all without replacing your current hardware.
1. Identify the Problem Using Task Manager
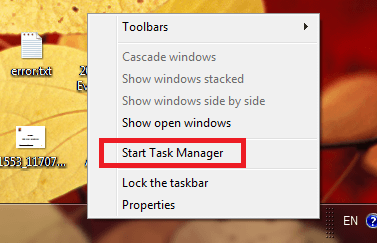
Your first step is to open Task Manager and locate which processes are consuming CPU power.
Press Ctrl + Shift + Esc, then click on the Processes tab. Sort by CPU usage to spot the culprits. Some common offenders include Windows Defender, background apps, or third-party software.
If you see a particular program using excessive CPU, right-click and select End Task to stop it temporarily. For a more permanent fix, you’ll need to adjust startup and background settings.
Learn more about how to use Task Manager effectively.
2. Disable Unnecessary Startup Programs
Too many startup programs can overload your CPU right after booting. Cleaning this list improves speed and responsiveness.
In Task Manager, go to the Startup tab. Disable apps you don’t need during startup. Alternatively, open Settings > Apps > Startup to manage the same list with descriptions.
You can also use tools like Autoruns for Windows to dig deeper into hidden startup items.
3. Scan for Malware or Crypto Miners
Malware is a major cause of high CPU usage, especially cryptojacking malware that silently mines cryptocurrencies on your system.
Run a full scan using Microsoft Defender or tools like Malwarebytes. Quarantine or remove anything suspicious.

Also, install a browser extension like NoCoin to block crypto-mining scripts.
4. Update Windows and Drivers
Sometimes, a Windows update or outdated driver causes CPU spikes. Keeping your system current ensures better stability and performance.
Go to Settings > Windows Update and check for updates. Also, update drivers from Device Manager. Right-click on CPU, display, and chipset drivers, then select Update driver.
For specific brands, use official tools like Intel Driver & Support Assistant or AMD Auto-Detect.
5. Disable Superfetch (SysMain) and Background Services
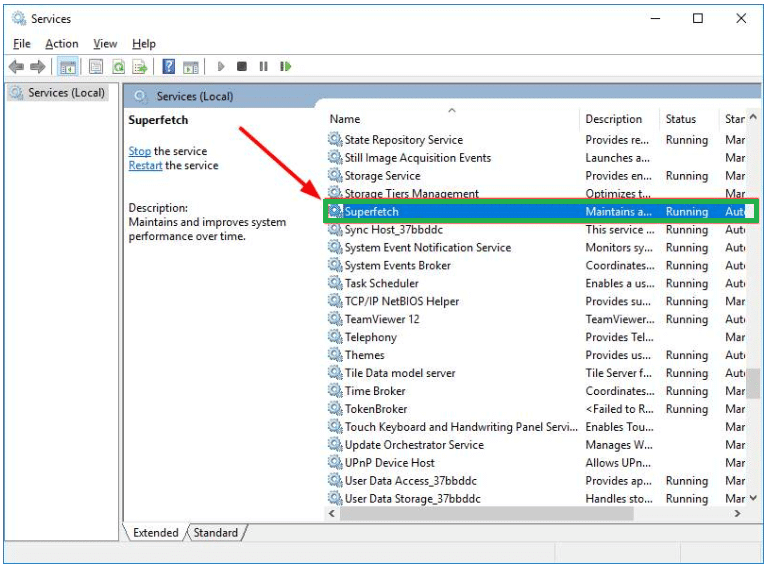
SysMain, formerly known as Superfetch, tries to optimize startup times but can hog CPU, especially on older systems.
To disable it:
- Press
Win + R, typeservices.msc, and hit Enter. - Find SysMain, right-click > Properties, and set Startup type to Disabled.
You can also turn off background apps via Settings > Privacy & Security > Background Apps to further reduce CPU usage.
6. Adjust Power Settings for Balanced Performance
Your PC’s power plan can affect CPU performance. High-performance mode may keep your CPU running at full speed unnecessarily.
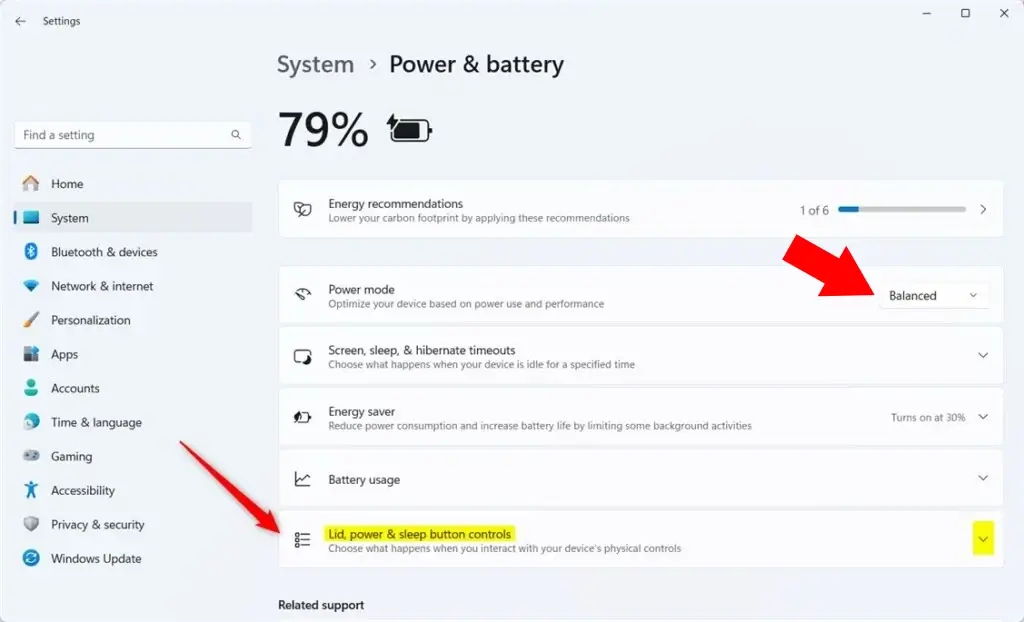
Navigate to Settings > System > Power & Battery > Power Mode, and set it to Balanced. Alternatively, use Control Panel > Power Options for more customization.
Balanced mode gives you a good mix of performance and energy savings, especially on laptops.
7. Fix WMI Provider Host and Runtime Broker Issues
Two services often cause high CPU usage: WMI Provider Host (WmiPrvSE.exe) and Runtime Broker. These aren’t malware but can behave poorly.
Use Event Viewer to diagnose WMI issues:
- Press
Win + X> Event Viewer > Applications and Services Logs > Microsoft > Windows > WMI-Activity > Operational. - Look for errors and find the associated process to disable or repair.
Runtime Broker spikes can usually be fixed by turning off live tiles and background tips in Settings > System > Notifications.
8. Reset Windows Performance Settings
If tweaks haven’t helped, try resetting performance settings. This often clears corrupted configurations.
In Settings > System > Recovery, use Reset this PC but choose Keep my files. This will restore Windows settings without deleting your data.
If you prefer a manual reset, go to System Properties > Advanced > Performance Settings, and select Adjust for best performance or Let Windows choose.
Final Thoughts
High CPU usage in Windows 11 doesn’t mean you need to upgrade your hardware. Often, the solution lies in good maintenance, system optimization, and awareness of resource-heavy applications.
Have you tried these fixes? Share your results, favorite tools, or new discoveries in the comments below—your input might help someone else speed up their system!