
Upgrading your laptop’s RAM and SSD is one of the fastest, most cost-effective ways to enhance performance. Whether you’re a student, gamer, or working professional, a slow laptop can hurt your productivity and experience. Fortunately, with a few tools and the right guidance, anyone can boost their laptop’s speed without buying a new machine.
In 2025, most modern laptops support upgrades—but the steps vary depending on the brand and model. Before starting, always check your laptop’s specifications and upgrade compatibility. With better RAM and a faster solid-state drive (SSD), you’ll enjoy faster boot times, smoother multitasking, and quicker file access.
Check If Your Laptop Can Be Upgraded
Not all laptops allow RAM or SSD upgrades. Thin ultrabooks or MacBooks may have components soldered onto the motherboard.
First, identify your laptop model. Then visit the manufacturer’s website or Crucial’s System Scanner to check upgrade options. You can also look up your laptop on NotebookCheck or the manufacturer’s support page for hardware upgrade details.
Tools and Materials You’ll Need
Before you begin, gather the following:
- Compatible RAM sticks or SSD (check DDR4 or DDR5 support and M.2 or 2.5” SSD form factor)
- Small Phillips screwdriver
- Anti-static wrist strap (optional but recommended)
- A clean, static-free surface to work on


You can find quality parts on Newegg, Amazon, or Crucial.
How to Upgrade Your Laptop’s RAM
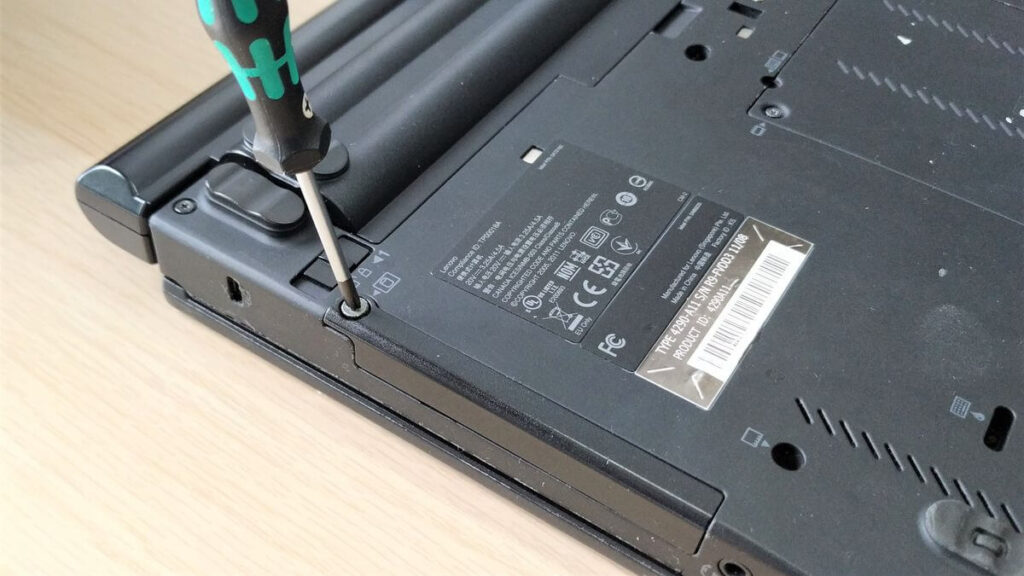
Step 1: Power Down and Open the Laptop
Shut down your laptop and unplug the power cord. Hold the power button for 10 seconds to discharge static energy.
Flip the laptop over and remove the bottom panel screws. Some models may have a dedicated RAM access panel. Refer to iFixit for detailed disassembly guides based on your device.
Step 2: Install New RAM Sticks
Gently push the retaining clips aside to release the existing RAM. Remove it at a 30-degree angle.
Insert the new RAM firmly at the same angle. Push it down until it clicks into place. Ensure compatibility with your motherboard’s capacity—most laptops support up to 32GB.
Step 3: Reassemble and Test
Reattach the panel and power on your laptop. To confirm the upgrade worked, press Ctrl + Shift + Esc to open Task Manager and check memory usage.
For advanced testing, use MemTest86 to verify RAM health and performance.
How to Upgrade Your Laptop’s SSD
Step 1: Backup and Create Recovery Media
Before upgrading your SSD, back up all files. You can use an external hard drive or cloud service like Google Drive or OneDrive.
Also, create a Windows recovery drive using a USB stick via Settings > System > Recovery to reinstall Windows after the upgrade.
Step 2: Locate and Replace the SSD
Remove the bottom panel as described earlier. Locate the SSD slot—either an M.2 or 2.5-inch bay. Unscrew and remove the old SSD.
Insert the new SSD at a slight angle for M.2 or align connectors for a 2.5-inch SATA SSD. Secure it with a screw if required.
Step 3: Reinstall Windows or Clone Your Drive
If you made a recovery drive, insert it and boot from USB. Follow the prompts to reinstall Windows on your new SSD.
Alternatively, use Macrium Reflect to clone your old drive before installing the SSD. This saves time and keeps your apps and settings intact.
Post-Upgrade Optimization Tips
After installation:
- Enable TRIM by opening Command Prompt and typing:
fsutil behavior query DisableDeleteNotify(0 = TRIM enabled) - Turn off disk defragmentation for SSDs via Control Panel > Administrative Tools > Defragment and Optimize Drives
- Adjust virtual memory settings for optimal RAM usage
Regularly check for firmware updates from your SSD or RAM manufacturer for peak performance and stability.
Final Thoughts
Upgrading your laptop’s RAM and SSD is one of the smartest tech moves you can make in 2025. It extends the life of your device, enhances speed, and boosts multitasking—all without spending on a new laptop.
Have questions or want to share your upgrade success story? Drop a comment below and let’s keep the tech conversation going!