
Let us begin by defining what a “virtual memory” is all about. It is a memory that appears to exist as main storage although most of it is supported by data held in secondary storage, transfer between the two being made automatically as required.

There are several other definitions of virtual memory in the internet. But to put it simple, a virtual memory is not actually RAM (Random Access Memory) or a part of a RAM. It is basically a portion of your hard disk drive that is used as a memory or RAM. Thus the name “virtual” memory.
In this article, I will show you how to increase your virtual memory in your Windows computer. The screen shots here are from my Windows 7 system but the procedures can be similar in Windows XP, Vista or 8.
Steps 1:┬ĀClick on Start and right click on “Computer” (My Computer in XP) then click on Properties.

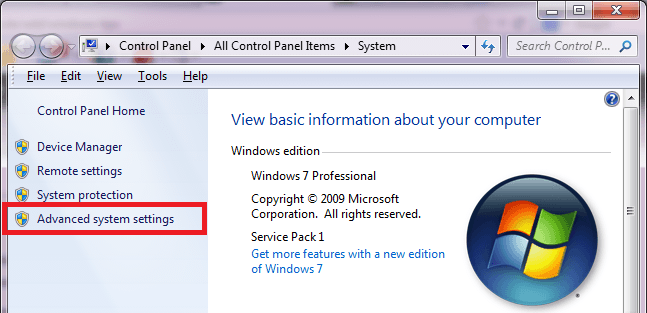
Steps 2:┬ĀIn the dialog box that appears, locate and click on “Advanced system settings” in the left panel.
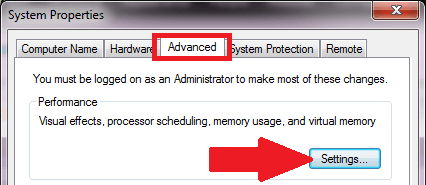
Steps 3:┬ĀIn another dialog box that opens, click on Advanced tab (It is already selected by default). Then click on the Settings button under the Performance group.
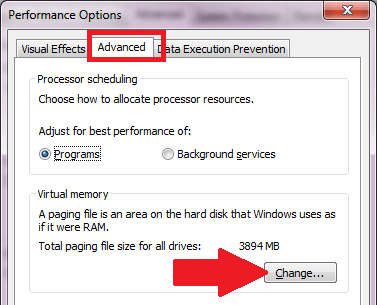
Steps 4:┬ĀOn the Performance Options dialog box, click on Advanced tab then click the Change button in the Virtual Memory group.
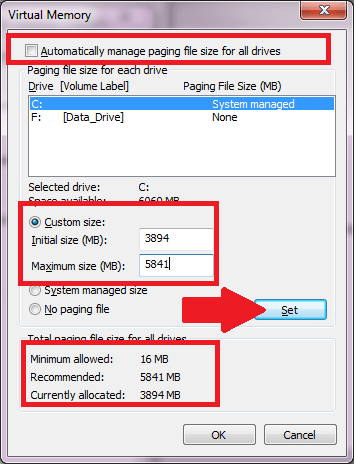
Steps 5: In the Virtual Memory dialog box, UNCHECK the box for “Automatically manage paging file size for all drives”.
Steps 6: Make sure that Drive C is selected. Then click to select “Custom Size”.
Steps 7: For the Initial size, enter what is shown as the “Currently allocated” value.
Steps 8: For the Maximum size, enter the Recommended value.
Steps 9:┬ĀThen click on the SET button.
Steps 10:┬ĀClick on OK to close all dialog boxes. Restart Windows and you are all set for a greater and faster computer experience.