
If you are using Windows Vista or the newer versions of Windows, you might not notice but you have a pre-installed security software called Windows Defender. The good thing is, it is free and it usually comes pre-installed in most systems. The bad thing is, there is no visible option to uninstall it.

There are several free antivirus software available today. One of the leading security tool today is Avast.
If you intend to use any free or commercial security software, during installation, these security programs are intelligent enough to disable your Windows Defender. However, it is better to disable Windows Defender manually if you are trying to use other security software.
How to Disable Windows Defender (Windows Vista and 7)
Method 1:
Step 1: Click on Start and in the search box, type: services.msc then press Enter. Or you can go to Control Panel => Administrative Tool => Services. Another way is to click on Start => Accessories =? RUN and in the RUN box, type: services.msc.
Step 2: In the Services window, click on the Standard tab to view the list better. Then scroll down and locate Windows Defender.

Step 3: When Windows Defender is selected as shown above, click on the STOP Service button to stop the service.

Step 4: When the service is stopped successfully, double-click on Windows Defender in the list to open its properties dialog box. Click on the combo box or the selection box for Startup Type then select Disabled.
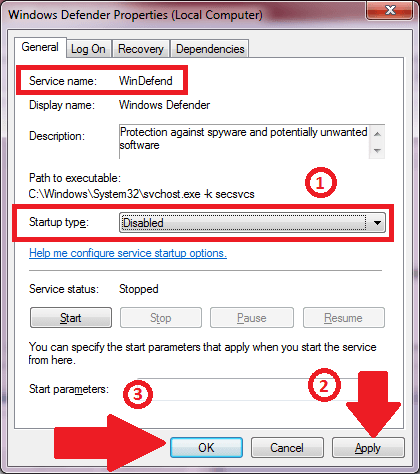
Step 5: Click Apply. Then click the OK button to close. When you restart your computer, Windows Defender will now be disabled and will not be taking your system resources.
Method 2:
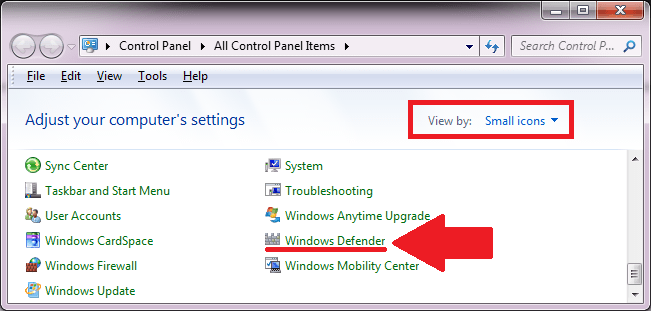
Step 1: Go to Start => Control Panel and then locate and open Windows Defender. If you don’t see it, change your View to “Small Icons” then locate and open Windows Defender.
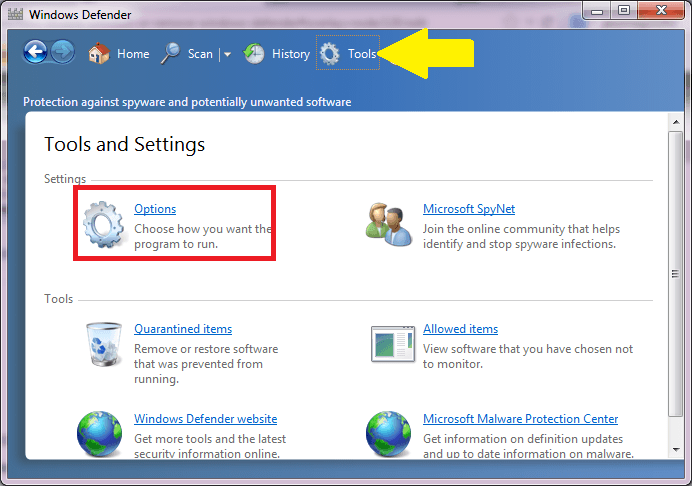
Step 2: In the Windows Defender window, click on Tools link then click on Settings.
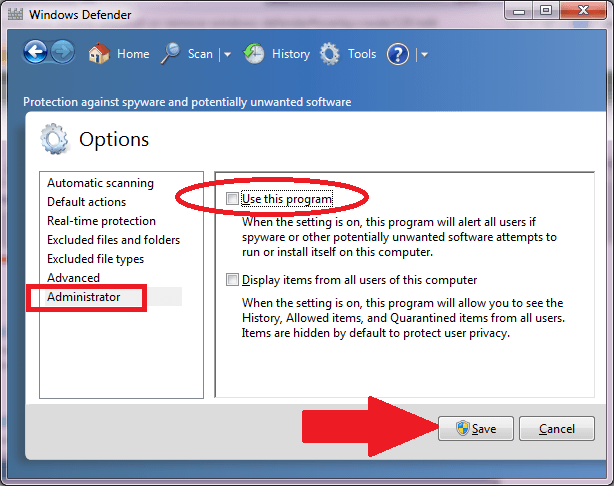
Step 3: In the Options window, click on Administrator at the bottom of the list in left panel. Then UNCHECK the option that says “Use this program”
Step 4: Then click on the SAVE button. Restart the computer then Windows Defender shall be totally disabled.
That’s it! If you have questions, please use the comment section.