When your email account ends with @Hotmail.com, @Live.com, or @MSN.com, it works on Outlook.com. Thus, there’s no need to change your address or get a new one.

However, if you want to use an address that ends with @outlook.com, the best way is to add an alias to your existing account instead of creating a separate email address. Basically, an “alias” is an additional email address that uses the same inbox, contact list, and account settings as the primary alias, or the primary email account. Also, you can sign in to your account with any alias—they all use the same password. Additionally, you can send email “from” an alias whether you’re using Outlook.com, a mail application or software like MS Outlook (or a Android app like Outlook) or any devices such as a smartphone.
With your Hotmail/Live/MSN/Outlook account, you can create up to ten (10) new aliases per year, for an overall maximum of ten. Deleting an alias removes it from the overall count, but not the yearly limit.
Here are the steps to create your email aliases with your Hotmail/Live/MSN accounts:
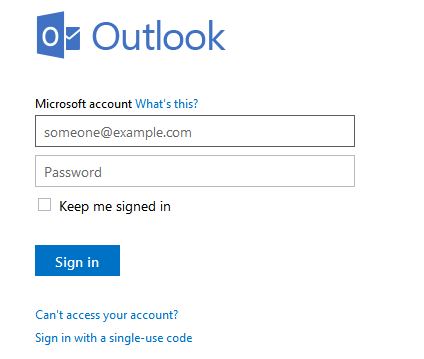
Step 1: Using your favorite web browser, go to http://hotmail.com to get the Hotmail / Live / MSN login page. (This is a centralized login portal for a so-called Microsoft password account so email accounts from Hotmail, Live and MSN converge to this login page)
Step 2: Enter your username and password to sign in.
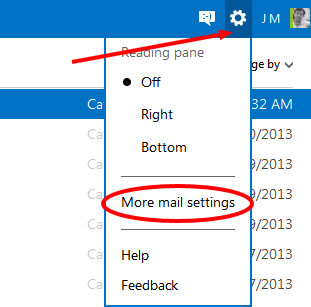
Step 3: When signed in, locate the small gear icon at the upper right hand corner of the page and click on it. In the pull-down menu that shows up, click on More mail settings.
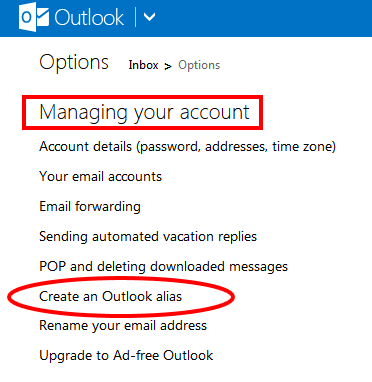
Step 4: Then you shall get a new page called Options. In the group called “Managing your account”, click “Create an Outlook alias”.
Step 5: “Microsoft account” page shall show up where you can create your alias. Remember, you can only have ten (10) aliases per year. Depending on your geographic location, the email domains available for you are @hotmail.com, @outlook.com and @live.com. Regional domains are also available based on the country you are in. Enter your desired alias, then select the desired domain for the alias. When done, click the Create an Alias button.
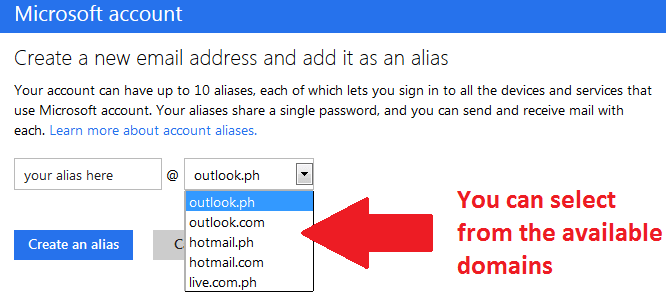
Step 6: Your alias is now ready! Congratulations!
Managing your Email Aliases
When you have several email aliases in your account, you can manage them and pick the one to be the default mailer, or the so called “From address”. Here are the steps:
Step 1: When signed in to your account, click on the small gear icon then click on More Mail Settings. Then under Managing your account, click on Your email accounts.
Step 2: All your email aliases shall be listed there including your original email which is referred to as “Primary alias” and is listed under Microsoft account.
Step 3: Scroll down to the bottom part to see the group called “Default FROM Address”. Using the combo box there, select the email account to be the default FROM address. This FROM address will then be the default email address in the FROM field when you create a new email message.
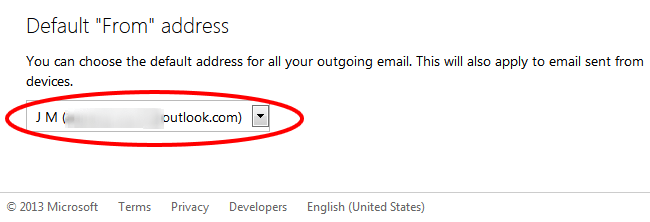
NOTE: When you create a NEW email message, Hotmail will automatically set your email address in the FROM field. In cases when you have several email accounts added to your Hotmail/Live/MSN account, the default FROM address is the original email account. Using the steps above will override this default. However, in the NEW email page, you can also pick which email account will be used in the FROM field to override the default address.
