We are used to seeing cells in MS Excel with a light gray borders. These are called “grid lines”. They are just there as a default behavior of MS Excel to provide visual boundaries among cells. These grid lines are NOT actually being printed by default, they are just visual aide to users to visually see the boundaries between cells.

When your Excel settings are messed up and you end up with just a plain white worksheets without those cell boundaries or grid lines, here are the steps to show the grid lines back:
Step 1: Open MS Excel and load or open the workbook that you are working on, the one that you want to display the grid lines back.
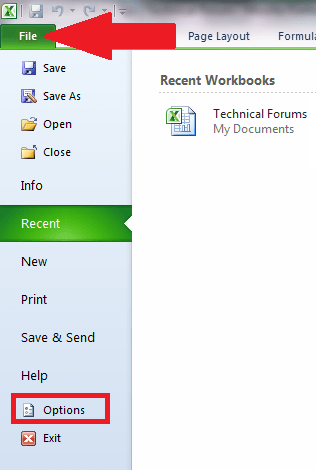
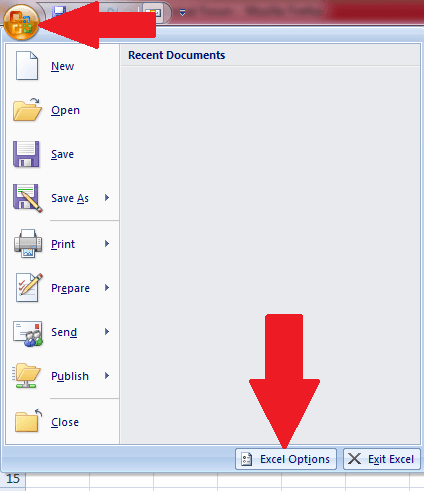
Step 2: While you are in the worksheet where grid lines are not showing, if you are using Excel 2010 click on File menu then click on Options. If you are using Excel 2007, click on the circular MS Office button, then click on Word Options button at the bottom.


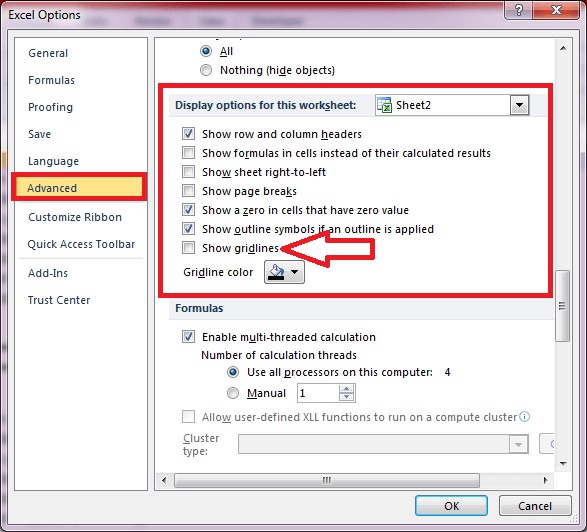
Step 3: In the Excel Options dialog box, click on “Advanced” on the left panel.
Step 4: Then scroll down and locate the group called “Display options for this worksheet.”
Step 5: There you shall see the check box called “Show grid lines”.
Step 6: Click on that check box to put a check, then click on OK.

Step 7: The grid lines will now show up in the current or active worksheet. If you have other worksheets with this same problem, do the same steps to show up the grid lines.
NOTE: These procedures also apply up to the latest versions of Excel.