In today’s digital age, having access to your email on your Android phone is essential for staying connected. Whether you use Gmail, Outlook, Yahoo, or another email provider, adding an email account to your Android device is a straightforward process. In this guide, we will walk you through the steps to set up your email account and ensure you never miss an important message.
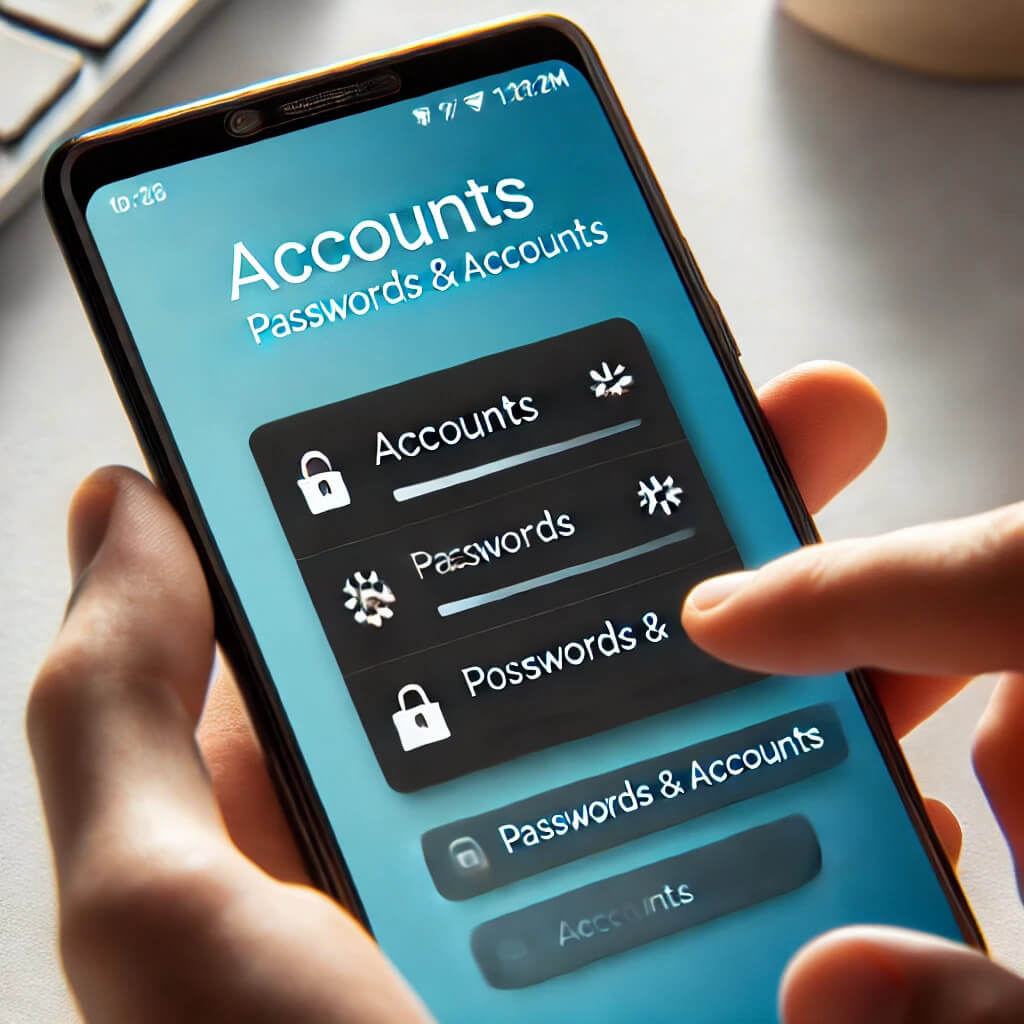
Step 1: Open the Settings App
- Unlock your Android phone and go to the Settings app.
- Scroll down and tap on Accounts or Passwords & accounts, depending on your Android version.
- Select Add account to start the setup process.
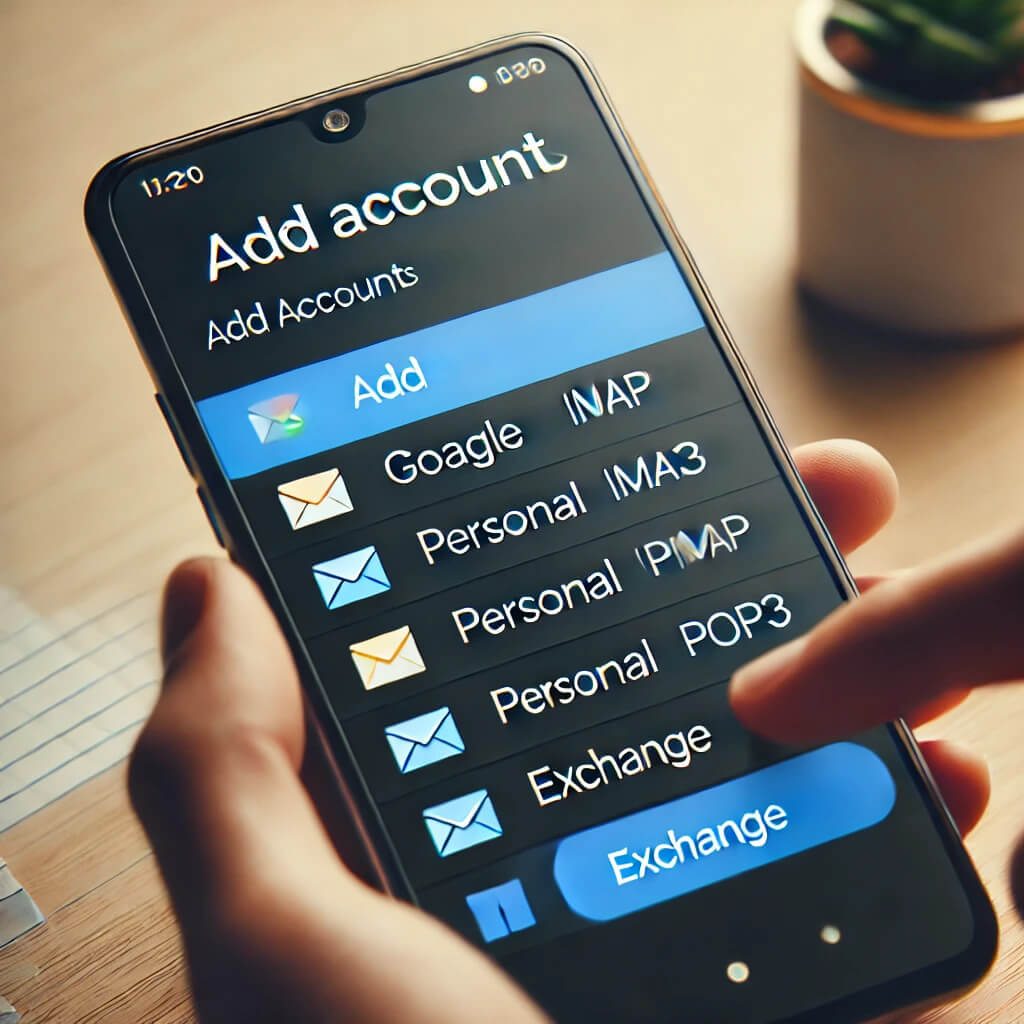
Step 2: Choose the Type of Email Account
- A list of account types will appear. Choose Google if you’re adding a Gmail account.
- If you’re adding a different email provider (e.g., Outlook, Yahoo, or another service), select Personal (IMAP/POP) or choose the specific provider listed.
- For work or school accounts, select Exchange or Microsoft 365, depending on your organization’s settings.
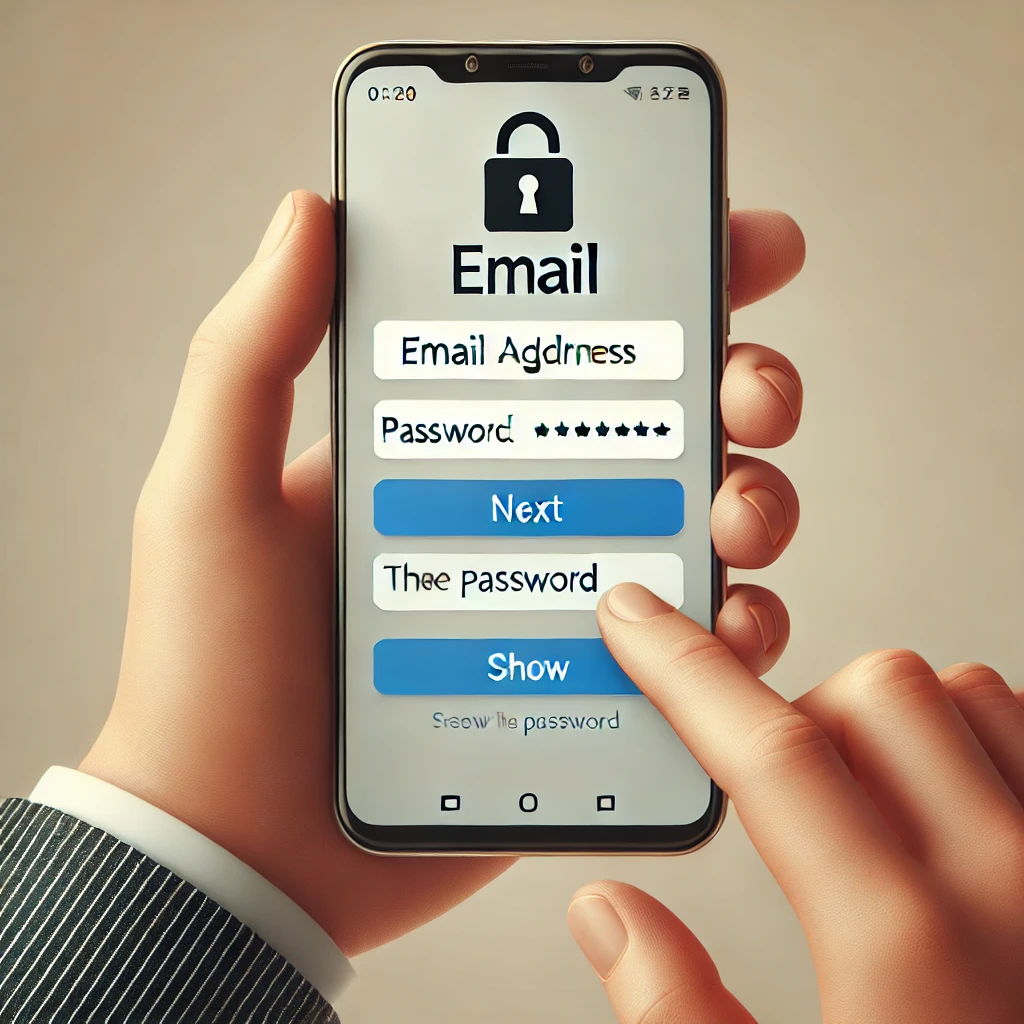
Step 3: Enter Your Email Address and Password
- Type your email address and tap Next.
- Enter your password and tap Next again.
- If using a Google account, you may need to verify your identity with two-factor authentication (if enabled).
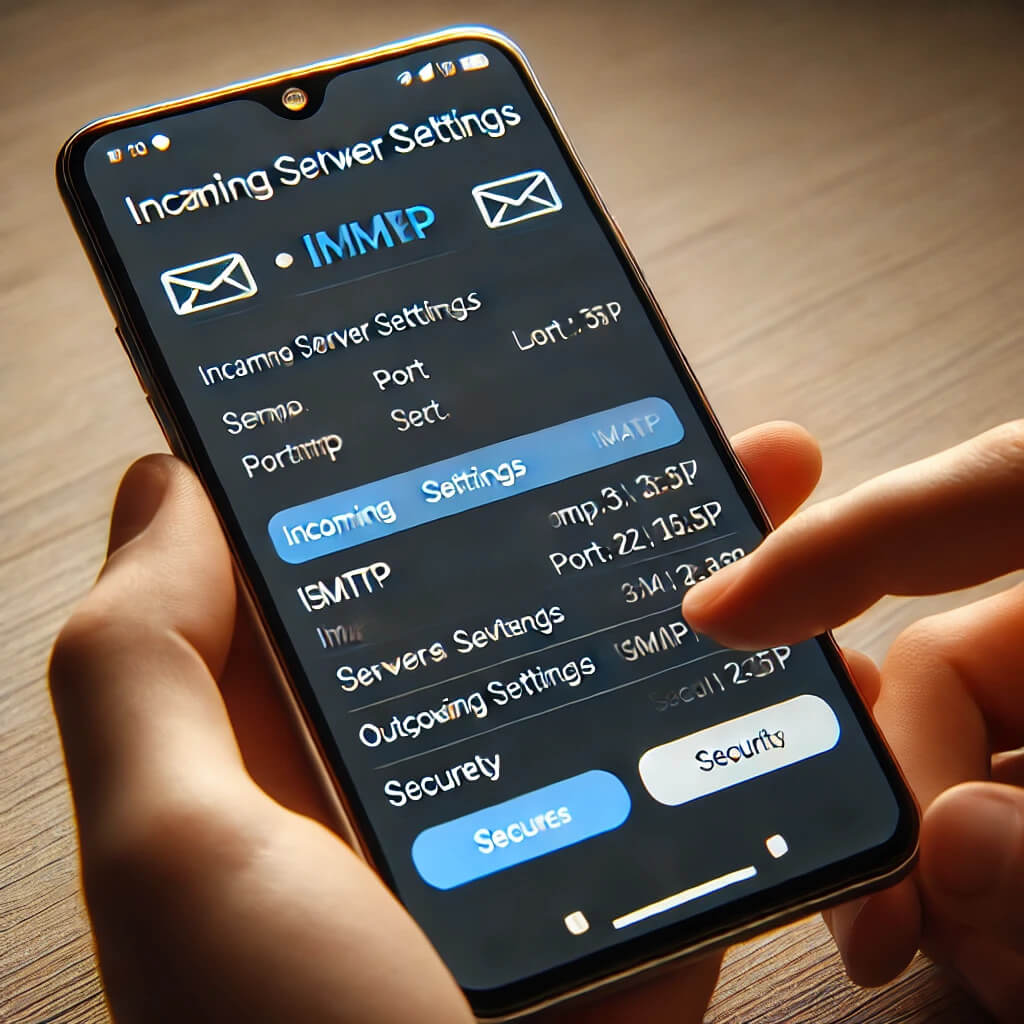
Step 4: Configure Incoming and Outgoing Server Settings (For Non-Google Accounts)
If you selected Personal (IMAP/POP) or Exchange, you may be prompted to enter server details manually. Your email provider should provide these details, but common settings include:
- IMAP Server: imap.your-email-provider.com
- SMTP Server: smtp.your-email-provider.com
- Port Numbers: Typically 993 for IMAP and 465 or 587 for SMTP
- Security Type: SSL/TLS for secure connections
Enter these details as prompted and tap Next.
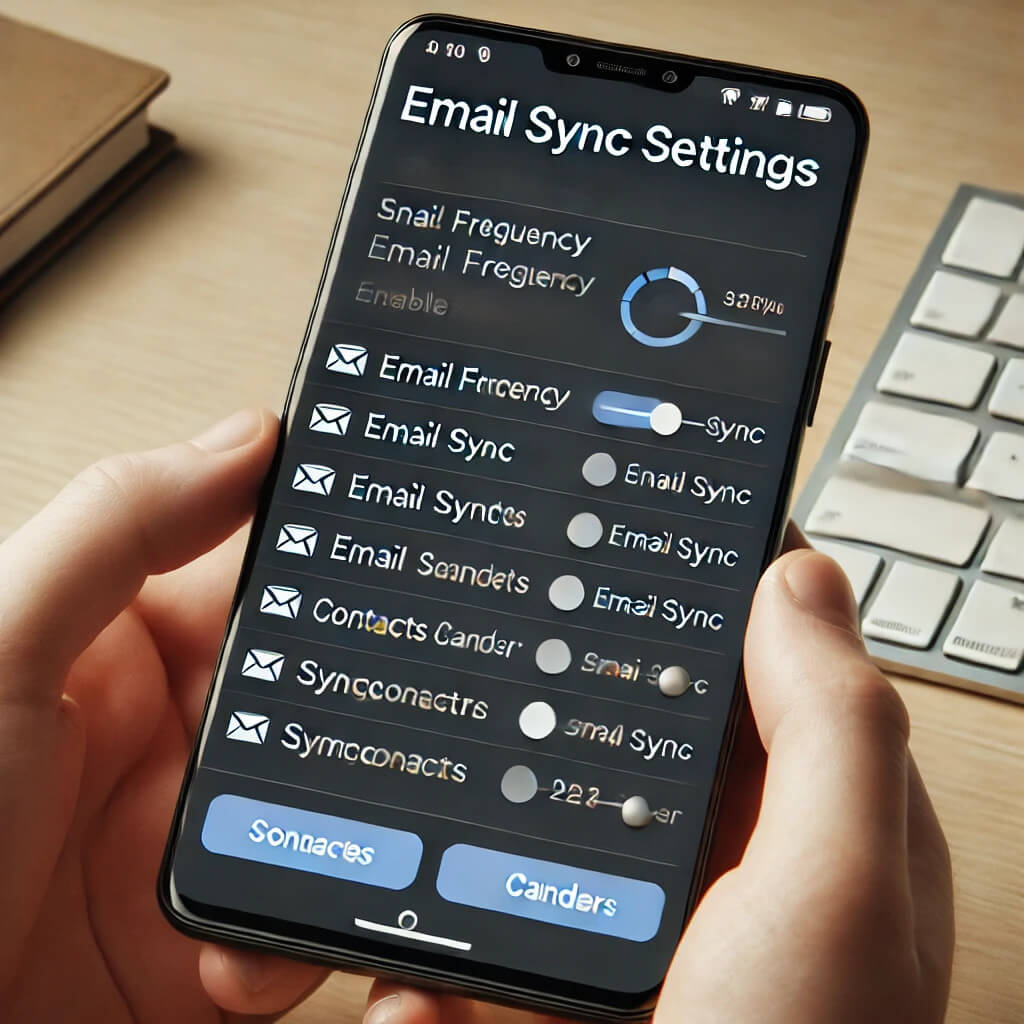
Step 5: Adjust Account Sync Settings
- Once your account is verified, you will be asked to customize sync settings.
- Choose how frequently your phone checks for new emails (e.g., every 15 minutes, every hour, or manually).
- Select whether to sync contacts, calendar events, and other related services.
- Tap Next or Done to complete the setup.
Step 6: Access Your Email
- Open the Gmail app (for Google accounts) or your preferred email app.
- Your newly added email account should now be visible.
- If you added multiple accounts, you can switch between them by tapping your profile icon in the top-right corner and selecting the desired account.
Troubleshooting Tips
- Incorrect Password Error: Double-check your password and ensure that caps lock is not enabled.
- Authentication Issues: If you have two-step verification enabled, use an app password or verify your login through your phone.
- Server Errors: If using a non-Google account, verify the IMAP/SMTP server settings with your email provider.
- Sync Problems: Go to Settings > Accounts > [Your Email Account] and make sure sync is enabled.
Conclusion
Adding an email account to your Android phone ensures you stay updated with important messages on the go. Whether you’re using Gmail, Outlook, Yahoo, or another provider, the process is simple and quick. If you run into issues, checking your credentials and server settings will usually resolve them.
By following the steps outlined above, you can successfully add and manage multiple email accounts on your Android phone with ease. Happy emailing!