
In the default Windows installation, basic functions and settings are already in place. Among these are the system icons located in the system tray or the items shown in the far right of the taskbar of Windows.
When you install software programs in your computer, some of them automatically create their corresponding icon in the system tray. Over time, and as you install more of these programs, your system tray will be filled with various icons.
To manage your system icons in your system tray, here are the steps:
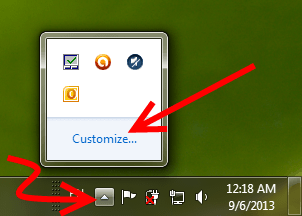
Step 1: Click on the small “up” arrow in the system tray.
Step 2: In the context menu that appears, click on “Customize…”
Step 3: In the dialog box that opens, you shall see all items or shortcut icons that are present in your system tray. You have complete control on the behavior of these icons. You can click on the selection box and can pick any option like “Only show notification”, “Show icon and notifications”, “Hide icon and notifications” and “Only show notifications”.
Step 4: Also, the setting is done per icon.
Step 5: After setting your preferred options in the icons listed, click on the link at the bottom that says “Turn system icons on and off”.
Step 6: In the next dialog box that opens, you can turn ON or OFF the system icons that are listed.
Step 7: Click OK
Step 8: Click OK again to close the dialog box
Your system tray icons will now behave the way you set them to behave.
NOTE: These procedures apply to Windows Vista and 7. The recent versions of Windows have different interface in managing notifications in the system tray.