In MS Excel, there are various way to create or provide a combo box or drop-down selection menu. One of the ways is described in my previous article.

Besides the data validation method, described below are the other procedures in creating drop-down menu is MS Excel. The most common of the ways to create a drop-down lists are the following:
- Form Control Combo Box
- ActiveX Control Combo Box
- Data Validation List
- “Pick From” List
Form Control Combo Box
In order to create an ActiveX Control Combo Box, you need to enable your Developer Tab when you are using Excel 2007 and later versions. Click on the Developer tab, and under Controls group, click on the Insert button. In the control buttons that appear, under Form Controls, hover the mouse pointer so that you will see which button is the Combo Box. Click on it then you shall see that the mouse pointer will change into a “plus” (+) pointer which indicates that you now need to draw the combo box.

In order for the Combo box form control to work, you need to assign it a list of data as its source. Also, you can store the selection that a user made in this combo box using the Cell Link option.
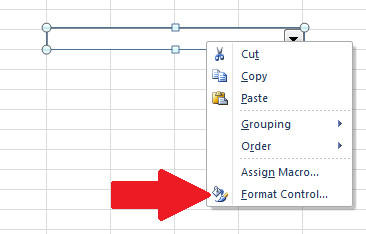
Right click on the combo box then click on Format Control.
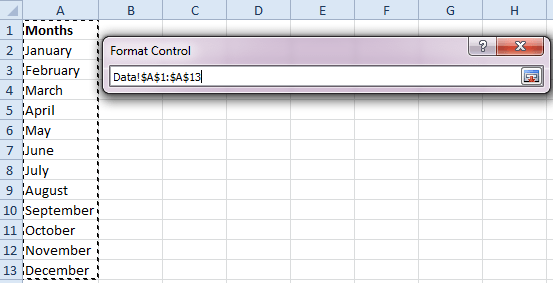
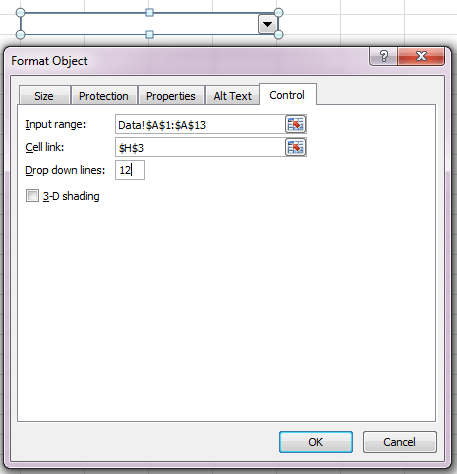
In the Format Control dialog box, you need to specify values for Input Range and Cell Link though the later is optional. The Input Range is basically the items that will be displayed in the combo box. The Cell Link on the other hand will store the selection index made in the combo box. For instance, if your list contains the months in the calendar, then selecting January will show 1 in the linked cell since it is the very first item in the list.
Now, click on the small button opposite Input Range. The dialog box shall shrink and you can now select the cell range where your data are stored. You need to do the same for Cell Link. However, for the Cell Link, you just need to pick a single cell, not a range of cells.
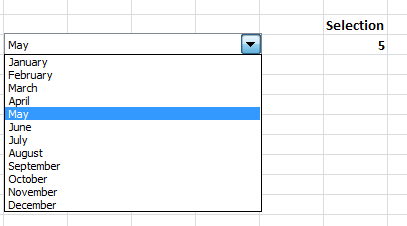
This time, click on OK to close the dialog box and you shall see that the combo box will now be working with the calendar months as data in the drop down menu.
The only problem with the Form Control Combo box is that the Font Size can’t be changed.
ActiveX Control Combo Box
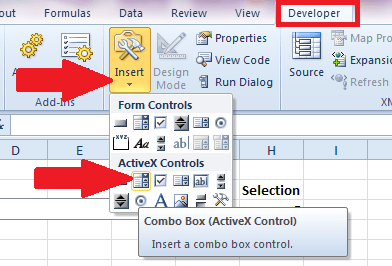
This is another form of combo box that you can create in your Excel sheets. To create this kind of combo box, click on Developer tab, then click on Insert button in the Controls group, then click on Combo Box under the ActiveX Controls group of button.
After drawing your desired combo box, right click on it then click on Properties. In the Properties box, locate the properties called LickedCell and ListFillRange. These properties are actually similar to Linked Cell and Input Range in the Form Control Combo Box. Therefore, you just need to manually enter the cell and the range of cells for these properties.

After entering the values for LinkedCell and ListFillRange, close the Properties box. Then in the Developer tab, if the Design Mode is highlighted, click on it to turn it off. In this way, you can then test your new combo box.
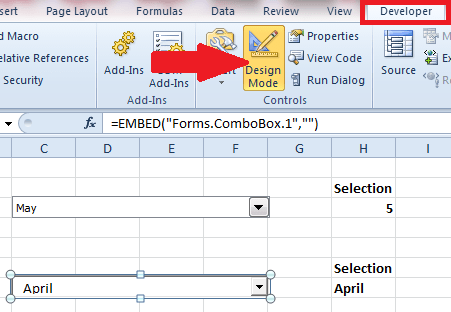
After the Design Mode is turned off, you can now test your combo box.
The good thing with using the ActiveX Control Combo Box is that using the Properties window, you can set various properties, such as font, font size, number of rows, and even include multiple columns.
The “Pick From” List
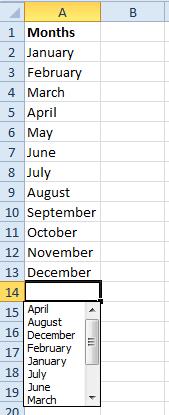
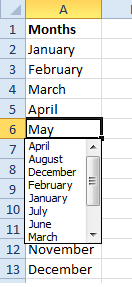
This type of combo box is technically built-in in Excel. It is not something that you create. It is actually a way to enter data in a cell by picking from a list of data in the cells above the selected cells or even when the selected cell is within the cells containing the list of data.
To activate the Pick From List, simple click the cell right below the list of data, press the ALT key then press the Down Arrow. Here are some screen shots to show cell positions where Pick From List will work.
You can download the working Excel file below.