Windows provides a way to capture the screen of your computer. This is useful when someone asked you for the actual look of your screen as part of a troubleshooting procedure where you cannot allow the other person to remotely control your computer. Capturing your screen and saving the image or picture will then allow you to send the screen shots to help the other person visualize your problem scenario.
To make a screen capture, here are the steps:
- Prepare the desktop or screen that you want to capture. That is, if you are trying to show a certain part of a program like MS Word, or any program in your computer that you wish to be captured, please prepare such screen or scenario for capturing. In case of capturing a certain part of a program, like MS Word, please open MS Word and display the exact part that you want to capture.
- With the screen being visible, press the Print Screen key in your keyboard. For Desktop keyboards, it is called Print Screen/Sys Rq. In laptop keyboards, it is normally labeled as PrtSc.

- After pressing that Print Screen key, nothing noticeable will happen. It only loads the “picture” of the visible screen to your computer’s memory or RAM.
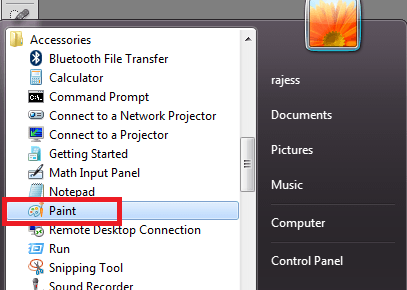
- To make use of the captured screen shot, you need to utilize an imaging software to handle the image. Click on Start => All Programs => Accessories => Paint.

- When Paint is open, click on the Paste button or press Ctrl + V.
- The screen that you captured will then be pasted in your Paint program. Save the file as JPG or PNG, ready for sending to another person that requires it.
Now, if you do not want to capture the ENTIRE screen, but would want a specific dialog box only, you need to press Alt + Print Screen key.
Another built-in tool in Windows Vista and 7 in allowing you to capture the screen, or just part of the screen, is the Snipping Tool. You can open it by going to Start => All Programs => Accessories => Snipping Tool. For Windows 8, 10 and 11, you can just type “Snipping Tool” in the Cortana search box and you shall be able to open the tool immediately from the search results.
