When the classic Hotmail interface was replaced by this “NEW Outlook” interface, several things changed. This includes working with email contacts, managing your contacts and creating categories or contact groups.

If you want to manage your contacts or the various email addresses you have accumulated over the years, one way to do so is by creating GROUPS. Groups are just “labels” or “categories” that will group email addresses together. When you send an email to a group, you just need to enter the group name or select the group from the list and all members of the group will receive the email. Thus, you only need to enter the group name and not the individual email addresses which can surely take some time.
To start working with groups in your Hotmail/Outlook account, please do the following:
Step 1: Open your web browser and go to http://hotmail.com. Sign in to your Hotmail account there.
Step 2: When signed in, you shall see your blue Outlook interface. To manage your contacts, click on the small “down-arrow” next to “Outlook” in the upper left hand corner of the page.

Step 3: Four option buttons shall show up or pull down. Click on “People“.
Step 4: Another screen for People appears. By default, the filter is set to ALL. If you have existing groups or categories, you can click on ALL to view the other groups which serves as filter.

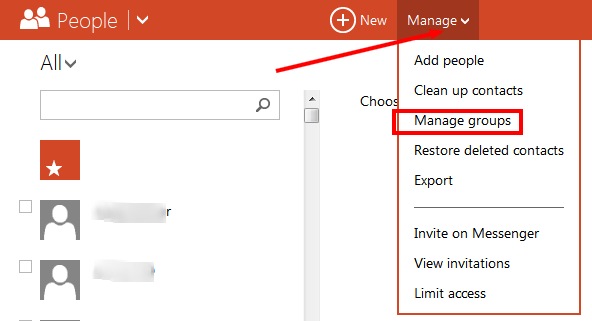
Step 5: To create a GROUP to manage your contacts, click on Manage menu, then click on Manage Groups
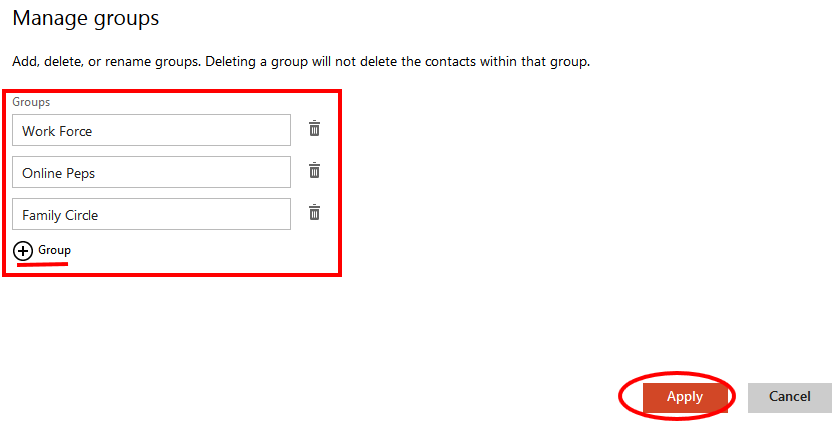
Step 6: Enter a name for your GROUP in the box provided to create that group. If you want to add more groups, click on the +Group button to add another field to accommodate your desired number of groups. When all group names are enter, click on APPLY to finally create the groups.
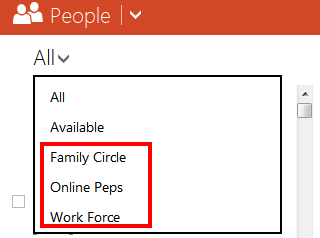
Step 7: After clicking APPLY button, the groups are created. You can check this by clicking on ALL and the group names shall appear as filters this time.
How to Add Contacts to Groups
After the groups are created, it is now easy to add your contacts to your groups. These are just categorizing your contacts and it will be easier to send an email to a group than manually selecting the individual contacts when you intend to send an email to a group of people.
To add contacts to your group, here are the steps:
Step 1: When you are in the “People” screen where ALL filter is selected by default, please click on a contact name in the long list to select a contact. Select as many contacts as you like that you want to add in a particular group.
Step 2: Every selected contact are shown as thumbnails pre-selected or checked. When all desired contacts are selected, in the menu at the top, click on “Groups“. There you shall see all your groups. Click which group you want to add the selected contacts.
Step 3: Then click on APPLY for the contacts to be finally added to the selected group.
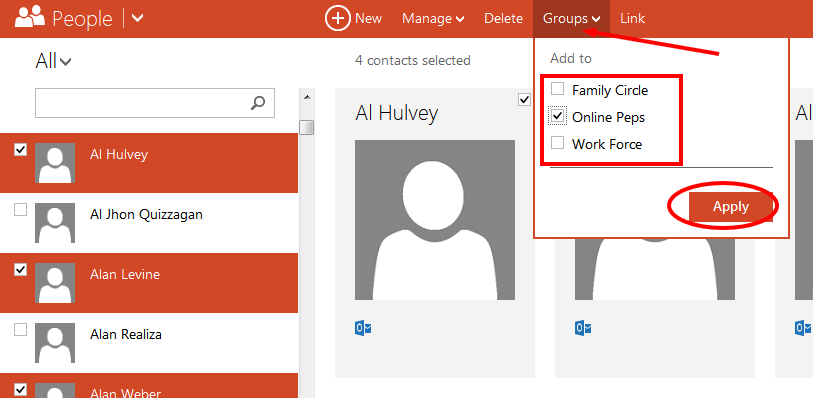
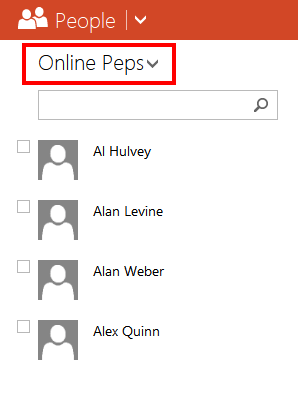
Step 4: Now, uncheck the contacts since they were all added already after clicking Apply button. Click on ALL then click the group where you added the contacts to see if they were indeed added to the group.
How to Delete a Group
If you want to delete a group, whether thousands of contacts are members of such group or only a few, please understand that only the group name will be deleted but the contacts are all intact. To delete a contact, you need to manually select that contact and then click on Delete in the menu above it.
To delete a groups, here are the steps:
Step 1: In the People page, click on Manage then click on Manage Groups.
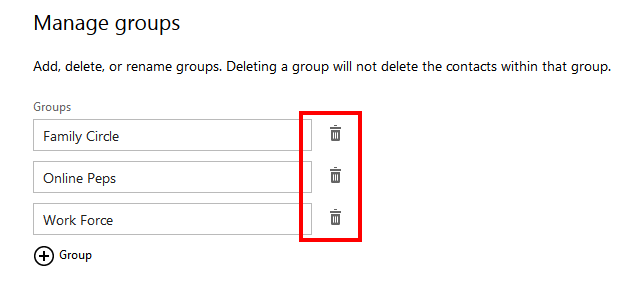
Step 2: In the list showing your groups, click on the small trash icon next to your group name. This will remove the group name from the list.
Step 3: Then make sure that you click on the APPLY button for the delete operation to actually take effect.
