If you just got your brand-new laptop or desktop today, chances are, your computer is shipped with the latest stable release of Windows 8. or Windows 8.1. In order to maximize your use of Windows 8/8.1, knowledge of basic Windows operations is of utmost importance.
This article will describe how to add and manage user accounts in this new version of Windows.
NOTE: These same procedures also apply in Windows 10 and 11 computers but the screenshots are made from a Windows 8.1 machine.

How to Add and Manage User Accounts
There are two (2) types of user account in Windows 8. First is the local account, which is very similar to accounts in previous versions of Windows like Vista and 7. The username is any acceptable combination of characters and an optional password. The second is called a Microsoft account. It is an email account associated with the Microsoft passport technology or infrastructure like Live, Hotmail, MSN, and others. This account is very useful if your computer is connected to the internet at all times since authentication of this Microsoft account needs an internet connection.
To add a NEW user account:
- Open Control Panel. There are several ways to do this. If your computer keyboard has Windows 8 shortcuts like my HP desktop, you can press the Fn key and the respective function key. In my case, it is Fn+F12 key combination opens Settings chime, then click on Control Panel. You can also press the Windows key and just type “Control Panel” and Windows will show Control Panel as a search results.
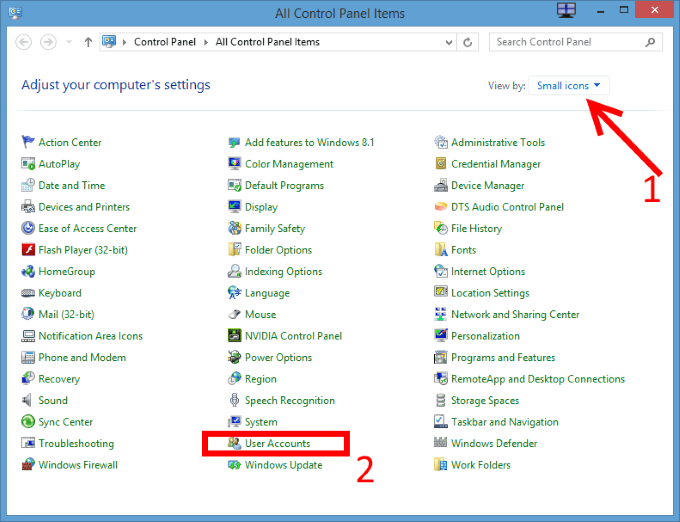
- In the Control Panel window, select View By option to Small Icons, as shown in my screen shot below. Then you click on User Accounts.
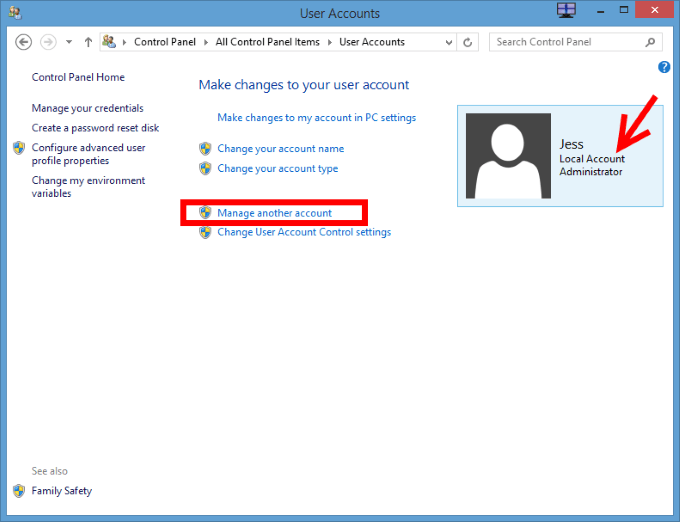
- You shall get your currently logged in user account information. You can also see your account type if it is a Local Account or a Microsoft Account.
- To create a NEW user account, which is the goal of this tutorial, click on Manage Another Account.
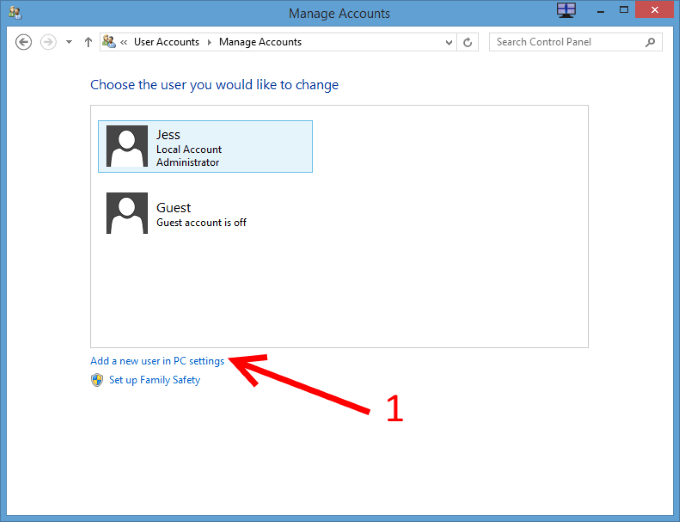
- Click Add new user in PC Settings link at the bottom.
- In the PC Settings screen, click Add an Account
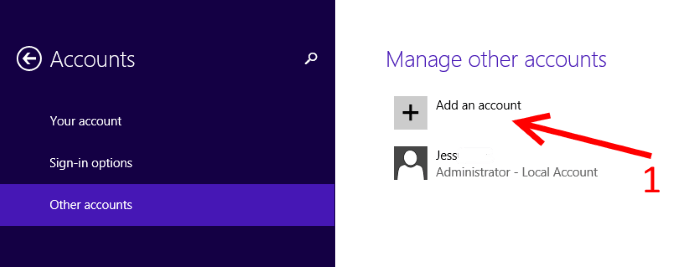
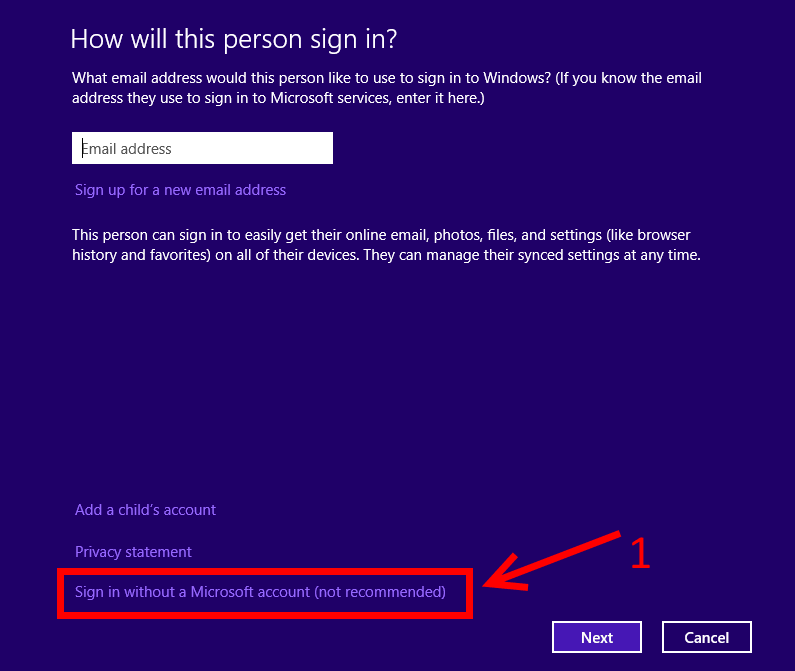
- In the next screen that shows up, you will be prompted for the options in creating the new account. It can be a child’s account, a Microsoft account, or a local account. If it is a Microsoft account, you need to enter your Microsoft email address, those emails of your ending with @hotmail.com and its reginal variants, @live.com, @msn.com, @outlook.com, and other Microsoft passport accounts. Then provide your password and create the account. The third option is a Local Account. For this tutorial, let us create a Local Account, so click on the link at the bottom that says Sign in without a Microsoft account (Not Recommended).
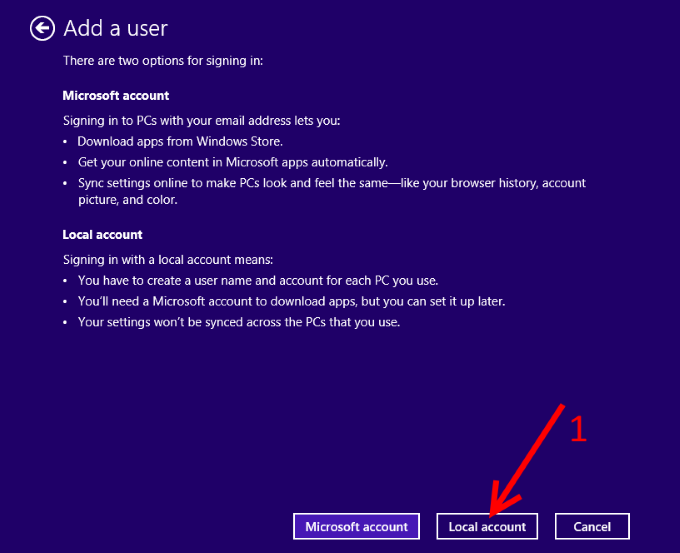
- Then you will be prompted again by another screen detailing the differences between the local and Microsoft accounts.
- Click on Local Account.
- Then follow the on-screen procedures.
After creating the local account using the procedures described above, the default account type created is a Standard account. This account has limited administrative privileges. This is ideal account for a child so that he cannot install anything on the computer since most installations require administrator privileges.
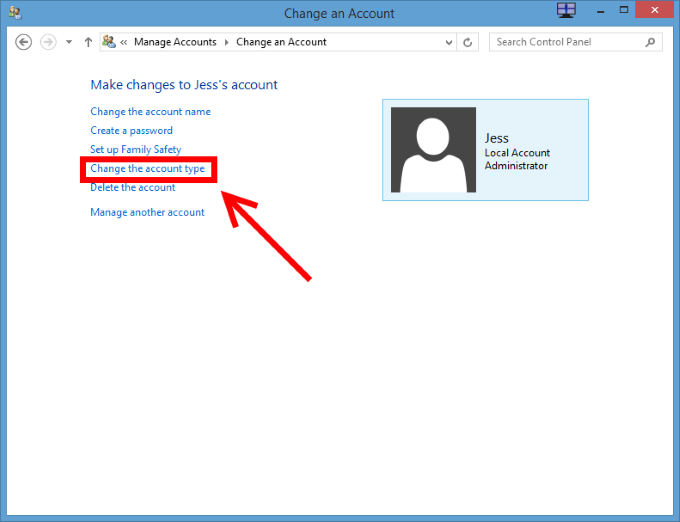
If you want to change a Standard user account into an Administrator, you need to be signed in using a user account that is an Administrator first, then select the account to be changed, then select Change the account type. Select Administrator instead of Standard, then finally click Change Account Type button.
