Using the NEW Hotmail interface known as Outlook.com with its “Microsoft blue” theme, several cool features are worth using. Among these features is the automatic deletion of emails from a specific contact in a given period of time. This is known as the “Scheduled Cleanup”.

This is specially useful if you are getting a daily emails and you don’t want to block them nor automatically archive them. Thus, you can setup a schedule to delete the emails in a “scheduled” manner. This also helps in keeping your Inbox in good shape avoiding tons of emails that can cause corruption if managed improperly.
In my case, I linked my Facebook account to my Hotmail, now Outlook.com. As a result, all of my friends in Facebook are added to my Hotmail’s Contact List. This is cool since you can interact with them in Facebook through Hotmail!
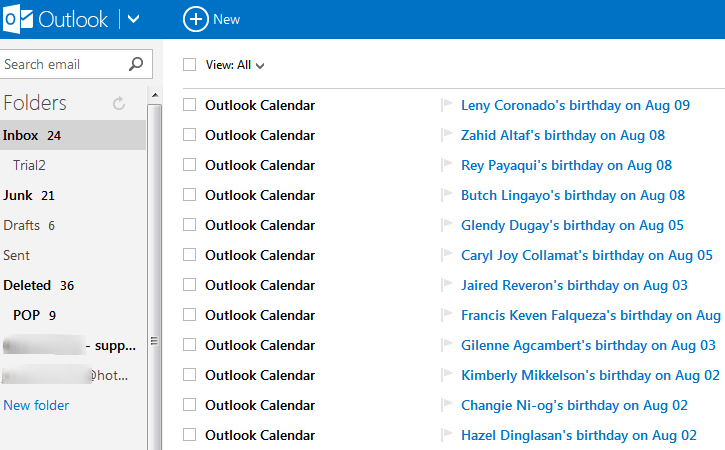
Moreover, I am notified through Hotmail as calendar notification for birthdays of my Facebook friends! This is good. But the bads side is, it is flooding my Hotmail Inbox.

How to Setup the Scheduled Cleanup
I will make my situation the scenario for these procedures. So the goal is NOT to block the Outlook Calendar notifications BUT to simply delete them at the appointed time, thus called a “Scheduled Cleanup”. Here are the steps:
- Using your favorite web browser, go to http://hotmail.com and login to your Hotmail account.
- When you are signed in, locate the emails in your Inbox that you want to delete automatically on schedule. In my case, it is the Outlook Calendar notification email.
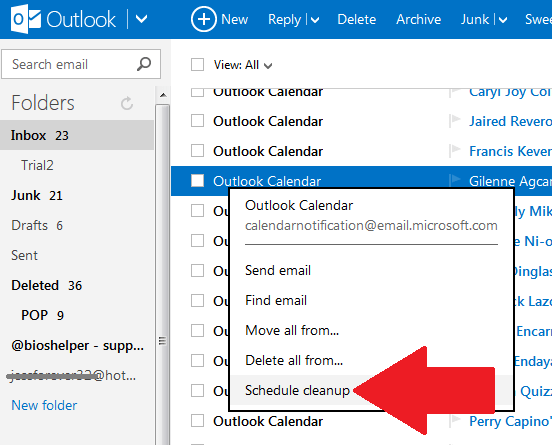
- Hover your mouse pointer to the Sender link in the listed email, in my case, it is the name “Outlook Calendar”. Just hover the mouse pointer, do not click on it.
- After few seconds, a context menu will appear, then click on “Schedule cleanup” command.

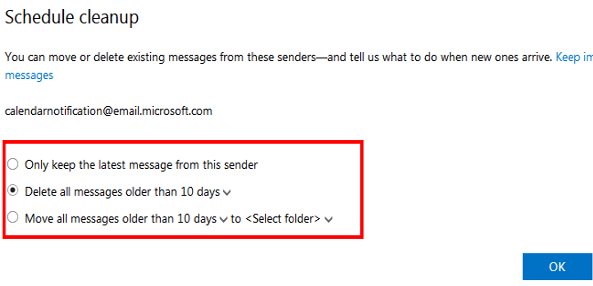
- Then you shall get the Schedule cleanup screen.
- You have two (2) major options here. First, you can DELETE the emails automatically. Second, you can MOVE the emails to your folder of choice. In these two (2) options, you can pick the number of days before the cleanup action is initiated.
- If you choose to DELETE, click on the radio button to select it, then pick the number of days in the drop down menu.
- If you choose to MOVE, click on the radio button to select it, then pick the number of days in the drop down menu, then click on Select Folder and then pick the folder in the list to where the emails will be moved on schedule.
- Click ok OK.

The action will then be carried out on your scheduled days.