If you are using Mozilla Thunderbird as your email client in your Windows or Mac, you might need to do some tweak in the default settings of Thunderbird particularly, its default timeout setting. This setting is responsible in setting a limit of the connection or negotiation protocol that governs or affects your sending or receiving of emails.

If you are sending an email with a huge attachment, it requires a longer time to complete the sending since the attachment needs to be uploaded first prior to sending. If the timeout setting kicks in, the operation will be halted and you shall get an error message like one below.

If you get this similar message with your Thunderbird, please follow the steps described below to adjust (increase) the timeout settings of your Thunderbird.
Adjusting the Timeout Settings in Mozilla Thunderbird
- Open Thunderbird
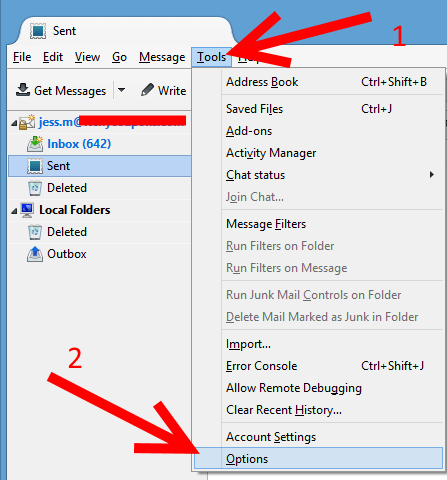
- Click on the Tools menu. If the menu bar is not shown, press the ALT key.
- After clicking on Tools menu, click on Options

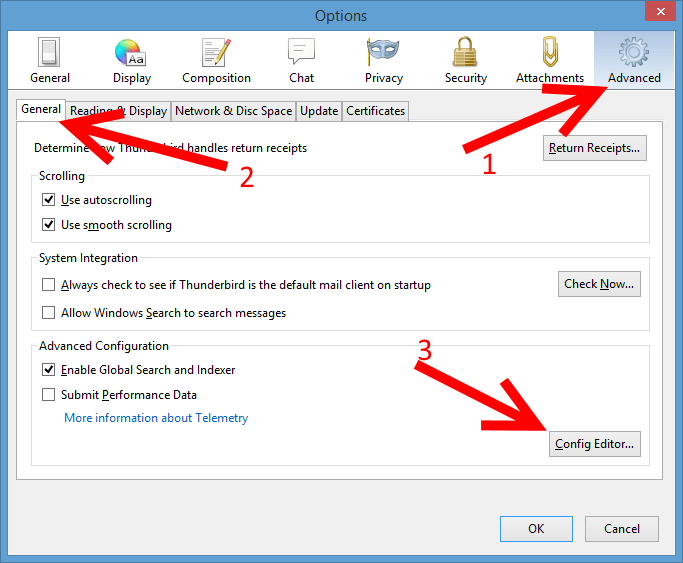
- In the Options dialog box that opens, click on the Advanced tab in the far right.
- In the sub-tabs, click on General tab
- Under Advanced Configuration group, click on Config Editor… button.

- Then you shall get a funny note in a dialog box. Click on “I’ll be careful, I promise!” button.
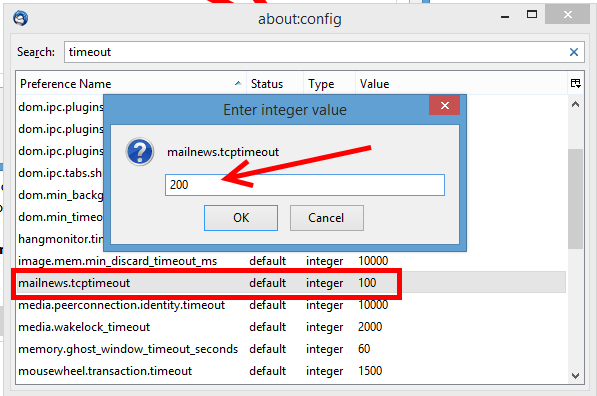
- You shall get the about:config dialog box for Thunderbird.
- In the Search box, type: timeout
- Scroll down and locate the entry called mailnews.tcptimeout. Its default value is 100 (no unit, just integer).
- Right click on it then click on Modify.
- Enter a higher integer there, like 200 or 1000 to increase the timeout of Thunderbird.

- Click OK
- Close about:config dialog box
- Click OK to close the Options dialog box
That’s it! The next time you launch Thunderbird, the new timeout settings will take effect.
