If you are using your Hotmail account for a very long time already, and as you are expanding your business, you might have accumulated other custom-domain email accounts. And switching between emails — from your Hotmail to your company emails, could be tiresome in the long run.

The good news is, you can centralize your email access to your Hotmail account. That is, you can receive your company emails, you can send from your company emails, while logged in to your Hotmail account. This is similar to Gmail’s centralized mailing features described in this link.
In order to make use of this feature of Hotmail, you need the following information:
- The user names and passwords of the other email accounts that you want to add to your Hotmail.
- The mail server names used by these email accounts. For instance in custom domain emails like @yourcompany.com, mail servers could be pop.yourcompany.com and smtp.yourcompany.com
To add your POP/POP3 email accounts to your Hotmail, please do these steps:
Step 1: Using your favorites web browser, go to http://hotmail.com and sign in to your Hotmail account.
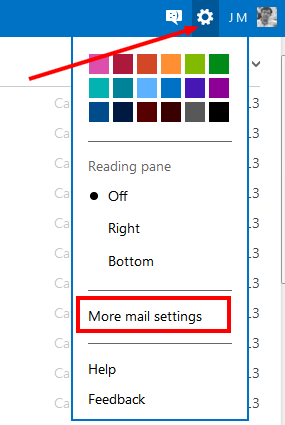
Step 2: Locate the small gear icon at the top right corner of your Hotmail page, click on it then click on More Settings.
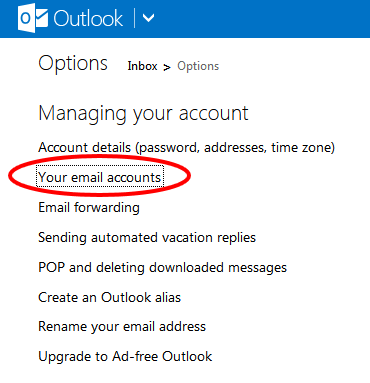
Step 3: Then you shall get the “Options” page. In the Options page, click on “Your email accounts” link under the “Manage your account” group.
Step 4: Then you shall get a page listing all your email accounts already added and those alias accounts. Scroll down to the very bottom of the page for additional options. There you can see the buttons that you can use to add your other email account to your Hotmail.
Add a send-only account if you are forwarding email from your other account, or if your account does not support receiving email through POP. Add a send-and-receive account if you are sending and receiving email from your POP account.
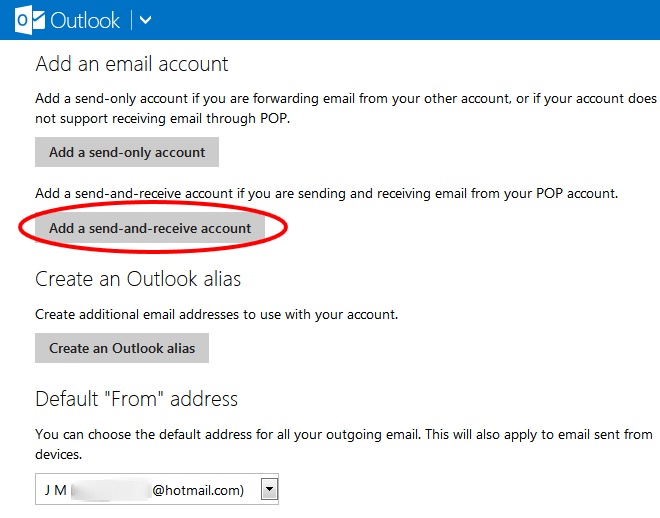
Step 5: Now, if your account is a POP/POP3 account, click on “Add a send-and-receive account” button to add your other email accounts to your Hotmail. In the next page that appears, please enter your name or fill out the required information. Then click on Next for the process to continue.
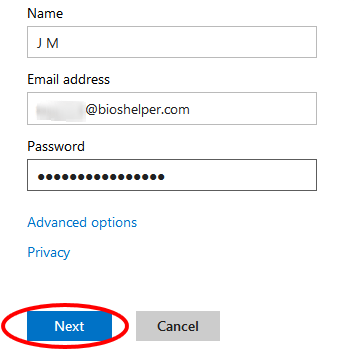
Then Hotmail will setup the account for you by automatically detecting the servers for your email account that you are adding. If Hotmail detected it successfully, then you are good to go. If not, then you will get the “Advanced options” page where you need to enter your server information manually. If all the information about your POP email accounts are correct, then Hotmail shall be able to setup the account successfully.
Step 6: Then Hotmail will provide you a way to filter how the email messages received to the newly added email will be stored. I suggest that you keep Hotmail’s suggestion of automatically filtering the emails to the custom folder named after your email address. After making a selection, click on Save button.
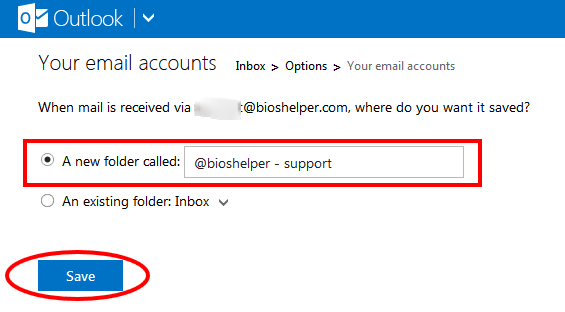
Congratulations! You can now access your POP/POP3 account within your Hotmail.
How to Send an Email Using the POP/POP3 Account
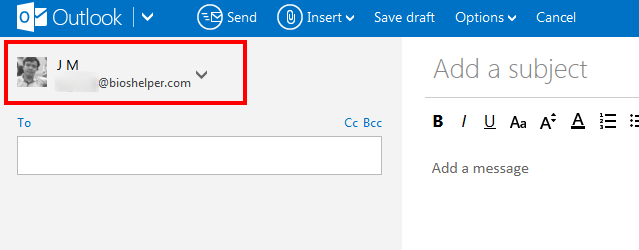
After successfully adding your existing POP/POP3 account to your Hotmail, you can now send an email from this POP account while you are still logged in to your Hotmail. That is, you can now customize the FROM email address when you send an email.
By default, the FROM email address is the original email. So when you intend to send an email FROM this POP email account, click on the FROM email address when you are in the Compose or in the NEW Message or NEW Email screen. There, you can pick which email address will be placed as the FROM or sender address..
