Starting with Windows Vista, Microsoft changed its built-in email client for the better. The former Outlook Express of Windows XP become Windows Live Mail, an integral part of the Windows Live Essentials software suite.

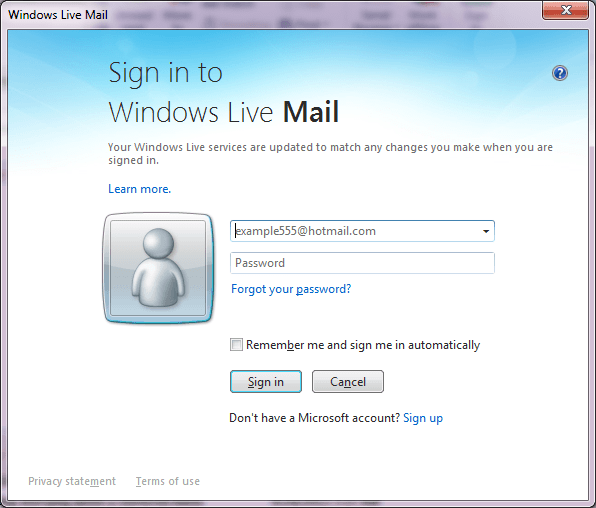
For Windows Live Mail users, especially if they are using a Microsoft account with their email client, can encounter a problem regarding a perpetual prompt of the sign in screen for Windows Live Mail that looks like this screen below:

Basically, this screen is not required in order to use Windows Live Mail. This is only required when you have a Microsoft email account like MSN, Live.com, Hotmail.com or Outlook.com that you use with your Windows Live Mail and you want to sync your emails.
The problem will actually start when the Microsoft account that was originally used in Windows Live Mail is removed or deactivated. That is the time that this annoying screen will pop up each time you start your Windows Live Mail.
To eliminate or stop the pop up screen, here are the steps:
Step 1: Open your Windows Live Mail and allow the program to initialize. If the “Sign in to Windows Live Mail” screen appears, you can simply close it.
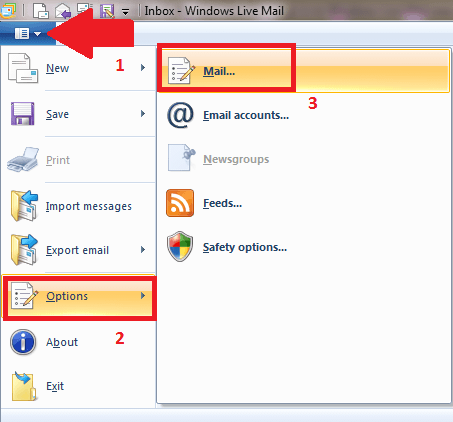
Step 2: Click on the menu button. That is the small down-arrow at the top left corner of the Windows Live Mail screen. In the pull-down menu that opens, point to Options then click on Mail.

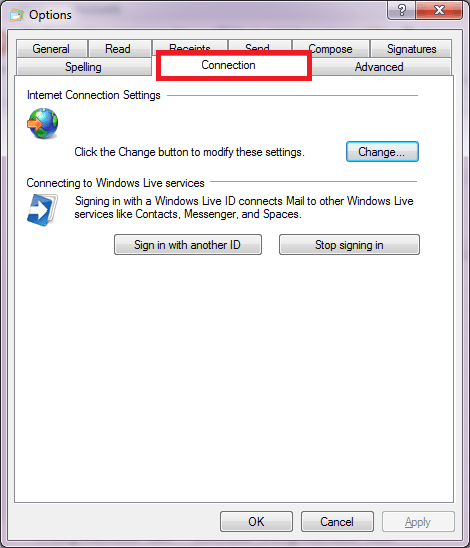
Step 3: In the Options dialog box, click on the Connection tab.
Step 4: In the “Connecting to Windows Live services” group, you have the teo (2) important buttons. The first one will allow you to sign in using another Micorsoft ID. This is useful when the first Microsoft ID that you used got hacked and deactivated so you need to associate your Windows Live Mail with a new Microsoft account. If the case is when the password of the Microsoft account was just changed triggering this sign in screen to pop up, simply sign in with the new password. However, if you no longer have a Microsoft email account and just want to get rid of the annoying sign in screen, simply use the second button to “Stop signing in“.
Step 5: When prompted, click OK to confirm.

Step 6: After doing that, the “Sign in to Windows Live Mail” screen will no longer appear when you open Windows Live Mail.