By default, system files have “hidden” attributes. This is set by Windows this way for a very obvious reason – hide the file to avoid or prevent accidental deletion of the files.
Users specially those with Administrator privileges or those who are members of the Administrator group can set the attribute of a certain file to “hidden” to simply hide the files.
However, in troubleshooting a computer system, we normally require access to the system files which are normally set with hidden attributes. In this case, we need to modify our Windows settings so that hidden files will show up when viewed in Windows Explorer. To do so, here are the steps:
Step 1: Go to Start => Control Panel
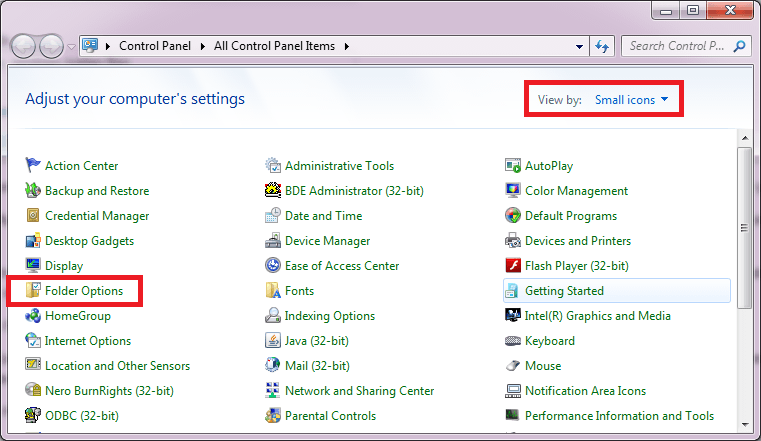
Step 2: The Control Panel window has several views. In Windows 7, it is good to set it to “Small icons” to display all control panel items. This can be done by clicking on the “View by” selection box at the top right corner of the Control Panel window then selecting Small Icons
Step 3: Open Folder Options

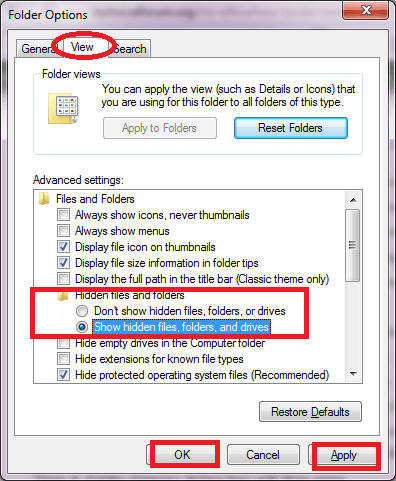
Step 4: Folder Options dialog box will then open.
Step 5: Click on the “View” tab
Step 6: Under the “Files and folders” group, click the radio option “Show hidden files, folders, and drives“

Step 7: Click on Apply
Step 8: Click on OK
After doing the steps described above, you shall then see hidden files, folders and drives. You can distinguish hidden items based on their light or grayed icons and file names when listed in any Explorer window.
