Since Microsoft’s release of Windows 10 to the public for free, several million of users a over the world upgraded to Windows 10. Wile others hesitated due to possible unwanted incompatibility issues. The later were right since one of the most annoying side-effects of the upgrade to Windows 10 is that MS Outlook is able to receive emails, but cannot send any emails out. Frustrating, right?

If you are unable to send an email in your MS Outlook 2007 or later program, then most likely, the very first thing that you will look at is your Outgoing Server settings. Whatever is your email provider, you will then begin digging and testing as to which server information and configuration will work.
If after making sure that your Outgoing Server settings are correct and intact, and yet your MS Outlook is still unable to send out emails, then you need to run the System File Checker that will scan and fix your system file integrity issues.
How to Run the System File Checker to Fix Outlook Issues
Close all of your Microsoft Office programs especially MS Outlook.
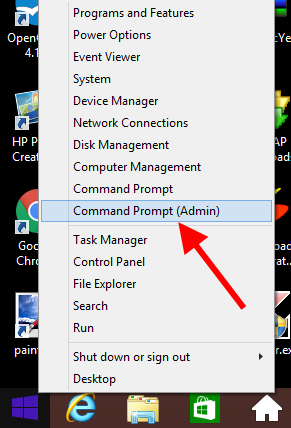
Right click on the Start button (the Windows logo at the left corner, then click on “Command Prompt (Admin)”.

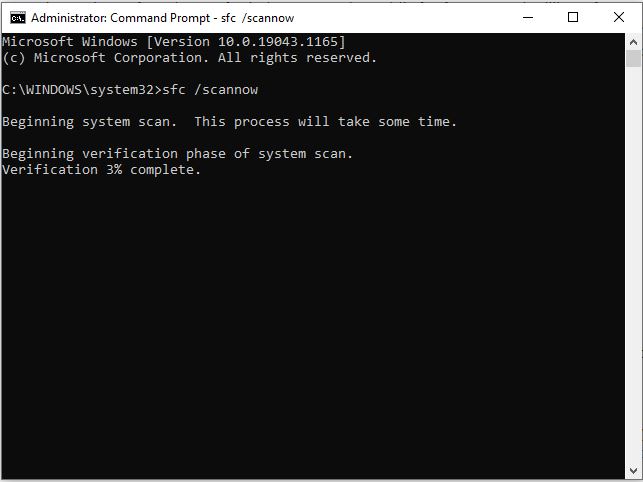
In the elevated command prompt window, type this command and press Enter to execute: sfc /scannow
Please note that in the formula above, there is space between c and /.

Allow the process to finish. After the process, restart the computer and Outlook shall be able to send emails again.
If have questions, please feel free to comment below.